In the previous blog post, we covered the basics of how to use Keycloak with Spring boot. In this blog post, we will explore Role-based Access Control to Rest API with Keycloak. So let’s get started!
Imagine we have a microservice for a Research Journal Management System that can serve users with two types of roles.
- Admin
- Members
There are certain APIs that can only be accessed by Admin such as adding or deleting a Research paper, approving member requests, etc. Similarly, there are certain APIs that are accessible to the members who have subscribed to the journal such as viewing Research papers, etc. In the mentioned scenario, we can implement Role-based access to our microservice.
First, we will do the Keycloak configuration steps which are as follows.
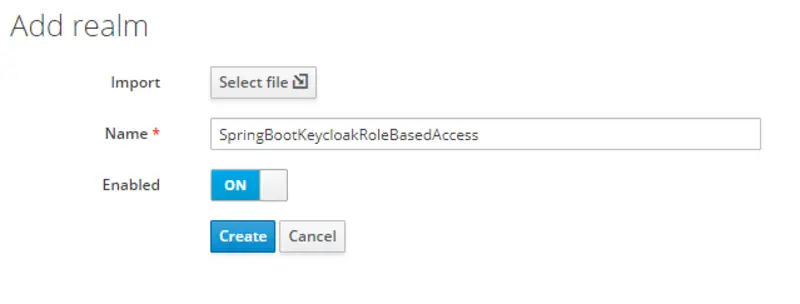
Create Realm
After logging in to the Keycloak console, in the top left corner there is an option of adding a new Realm.
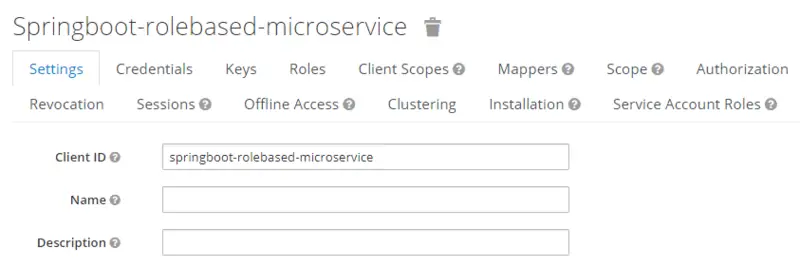
Create Client
In the left pane, there is an option for Clients. This will show all the clients in the new realm. Firstly, we will create a new client with the following configurations.
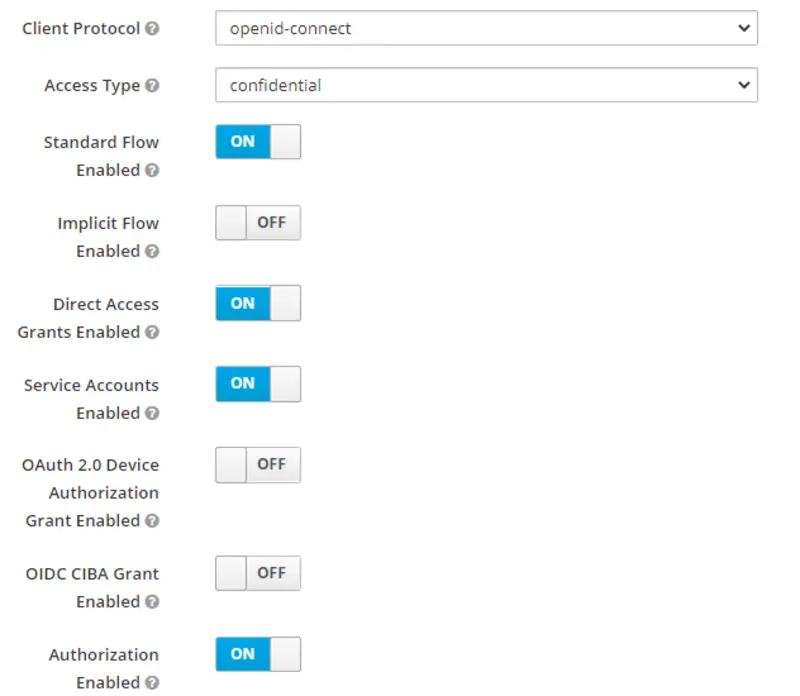
- Client ID: springboot-rolebased-microservice
- Client Protocol: openid-connect
- Access Type: confidential
- Authorization Enabled: ON
- Valid Redirect URIs: htttp://localhost:8080/*

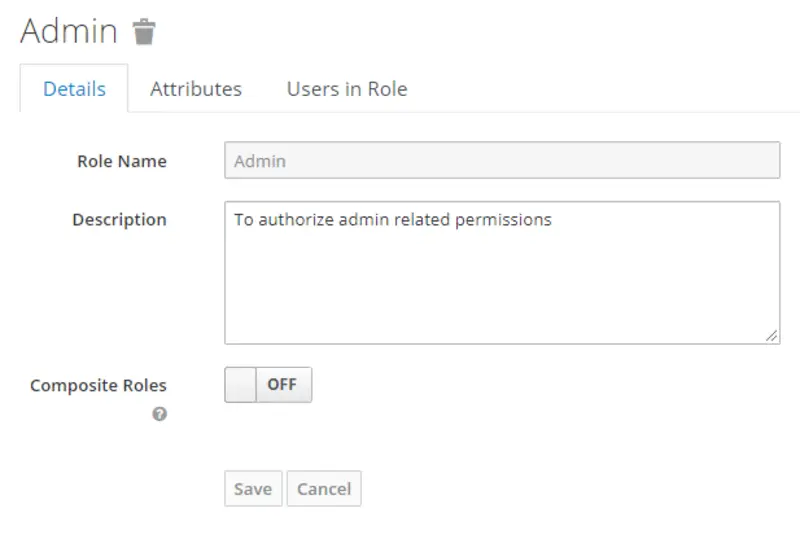
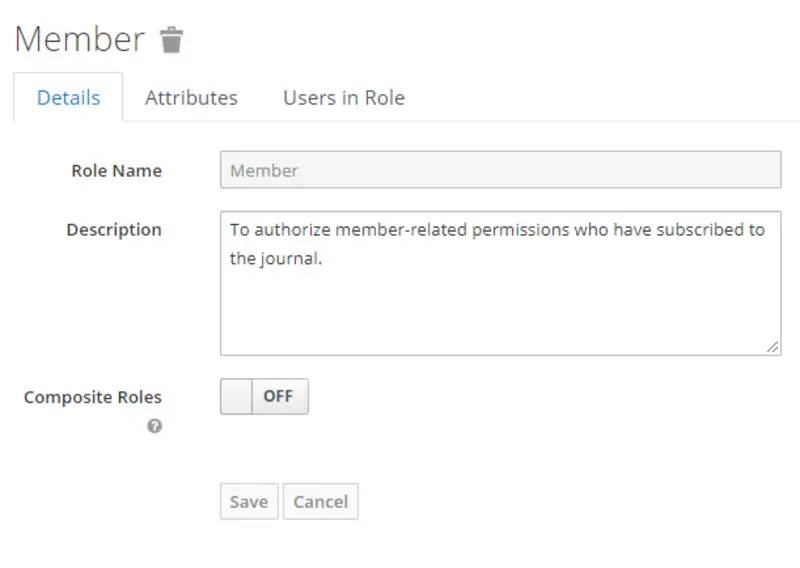
Now switch to the Client Roles tab and add the two roles that are Admin and Member for a research journal. First, click on add a role and then provide the required information.
Add role Admin
Add role Member
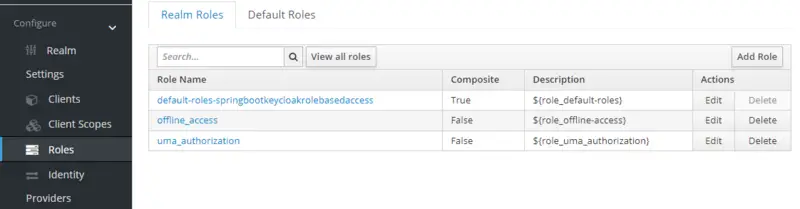
Create Realm roles
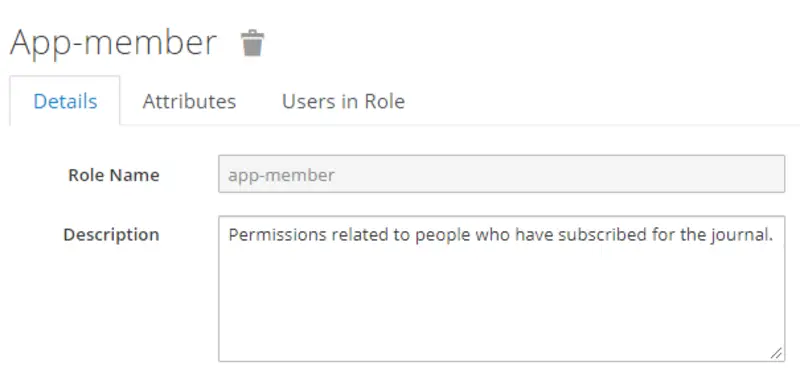
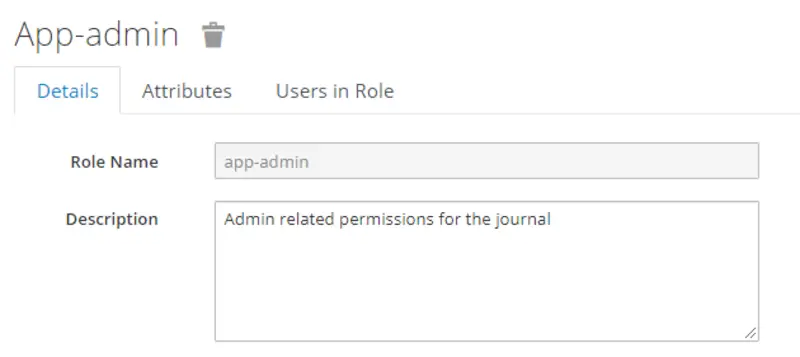
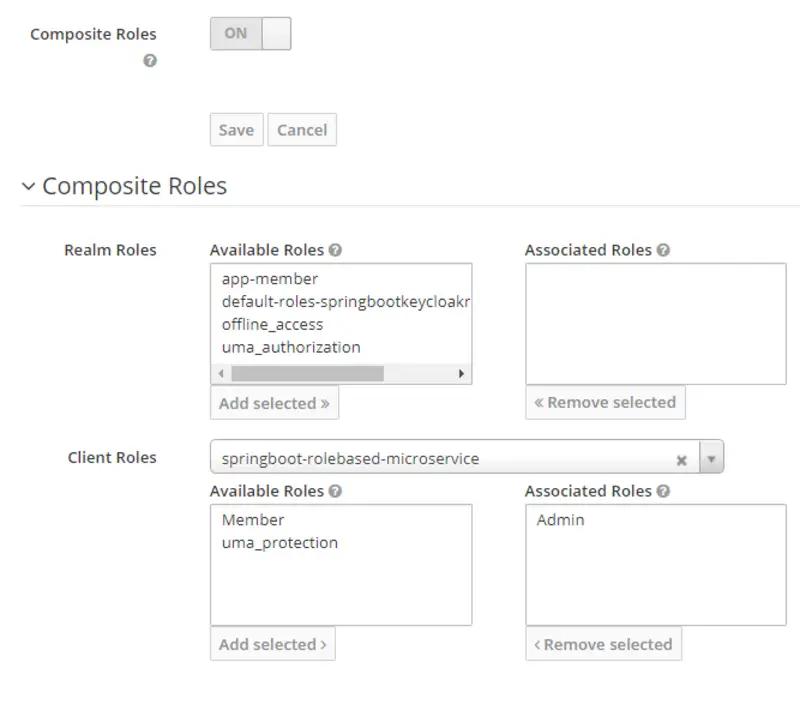
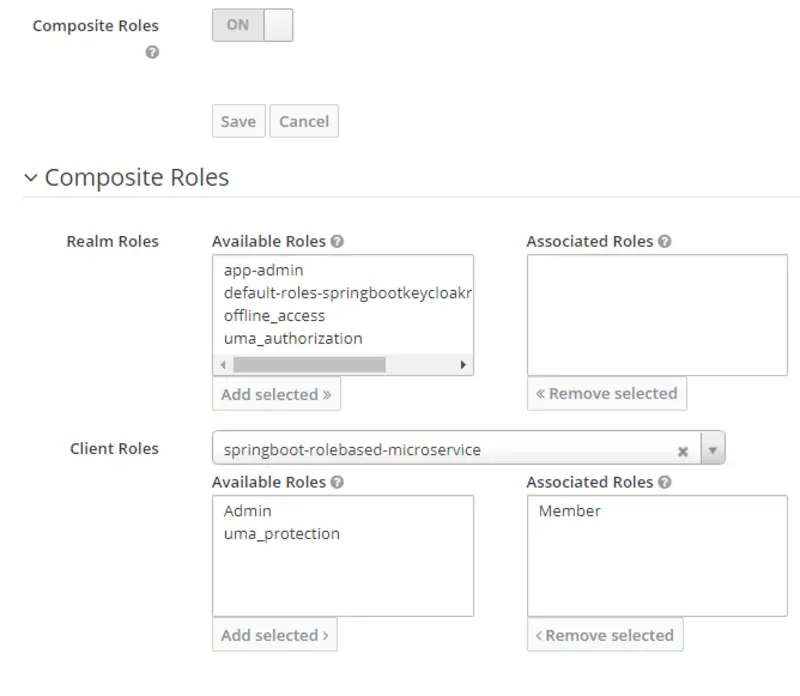
Now we will create Realm roles named app-member and app-admin, respectively, by assigning corresponding springboot-rolebased-microservice roles(Member, Admin). Following are the steps to do what is stated above.
- Click on Roles provided in the left pane. You will see all the realm roles listed here. Then click Add Role.
- Provide Role Name and Description for both roles.
- Enable Composite Roles for both roles. Then, select springboot-rolebased-microservice in the Client Roles drop-down. After that, select Member role and click Add Selected for realm role app-member and select Admin role and click Add Selected for realm role app-admin respectively.
Create Users
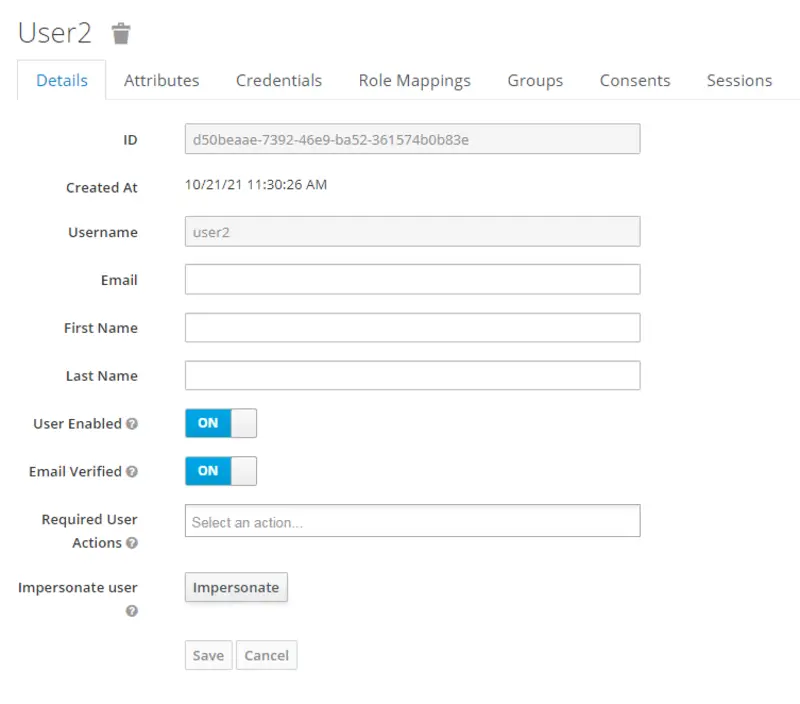
Now we will create two users, one with admin privileges and the other with member privileges. To create a user, go to the Users option in the left pane and then click Add User.
Provide the details of the user. For now, we will only enter the username. Then, set Email Verified to ON and hit the SAVE button.

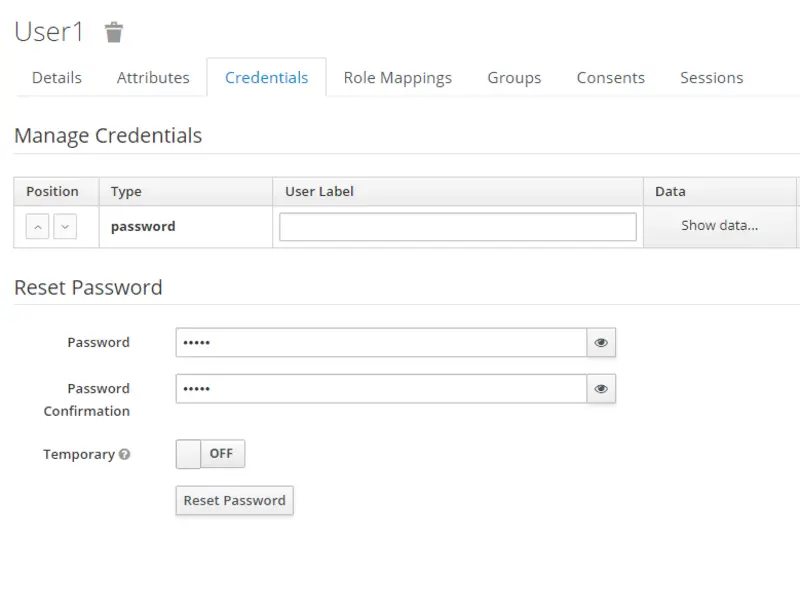
Now switch to the Credentials tab to set passwords for both the users. After that, set the Temporary Password option to OFF for both User 1 and User 2.
Now switch to the Role Mappings tab and associate both the users with Realm roles. The mapping of Realm roles for User1 and User2 is as follows.
- User1 -> app-admin
- User2 -> app-member
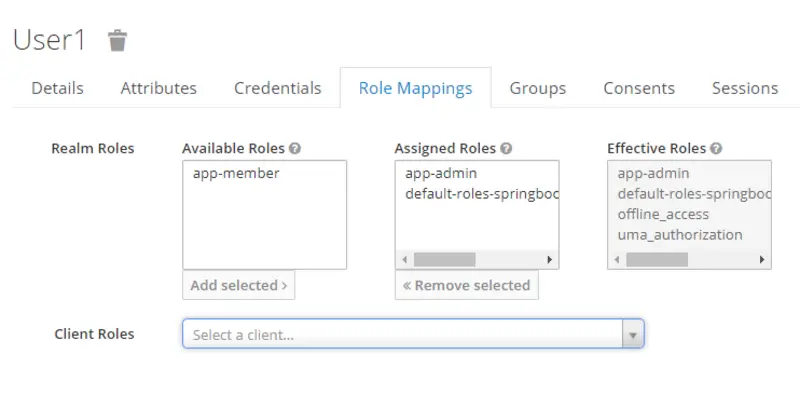
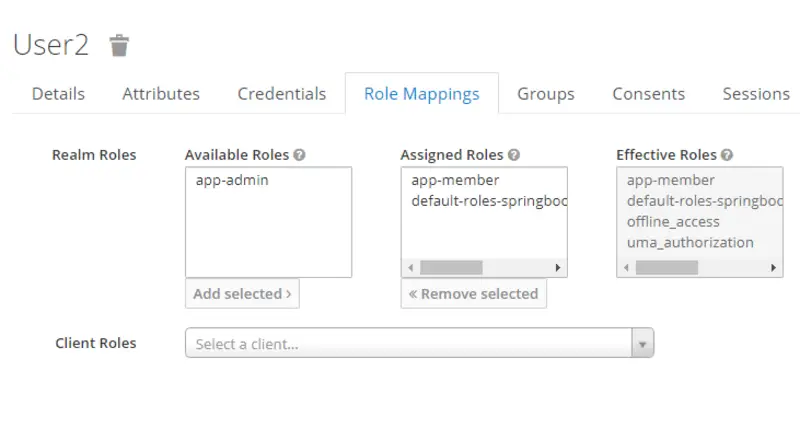
Note that here Available Roles are all the roles that can be assigned to a user and Assigned roles are the roles that we have assigned to the user.
Generate Access Tokens
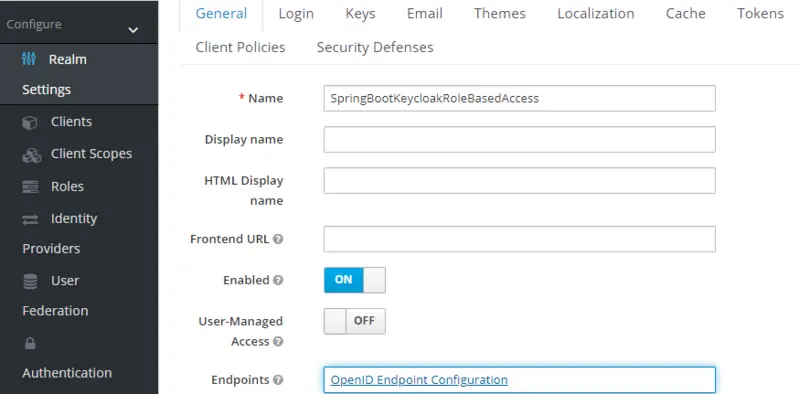
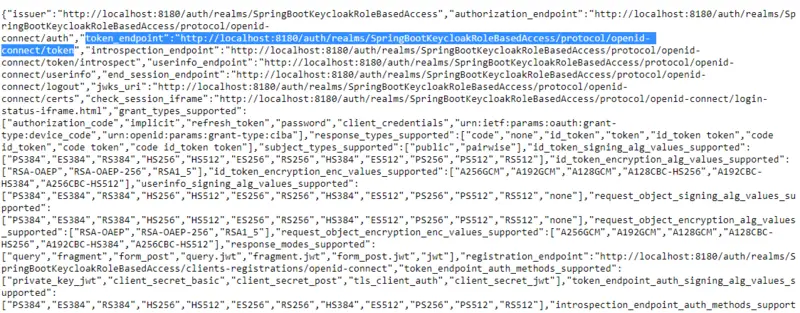
Now we will generate access tokens for our users. First, go to Realm Settings. In the Endpoints field, click on OpenID Endpoint configuration. Here you will find a URL for token_endpoint.
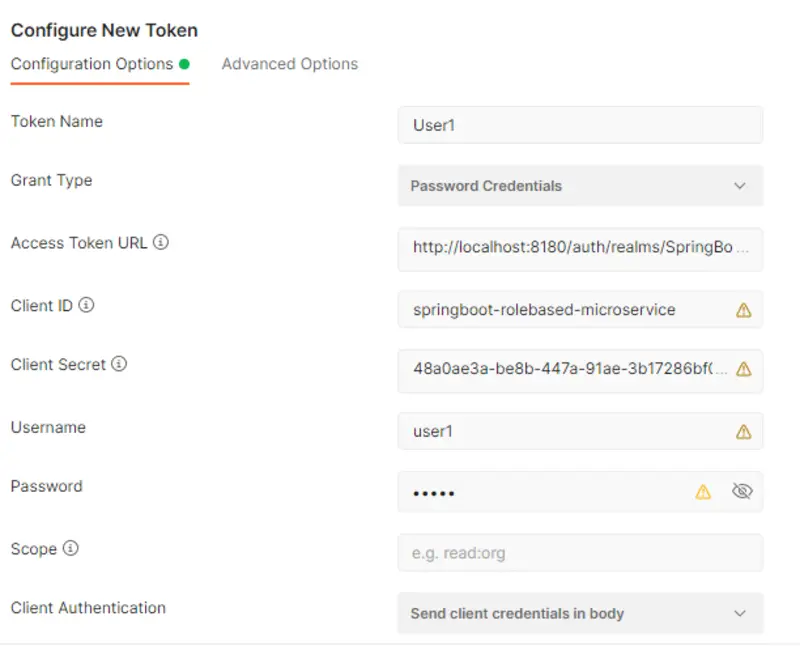
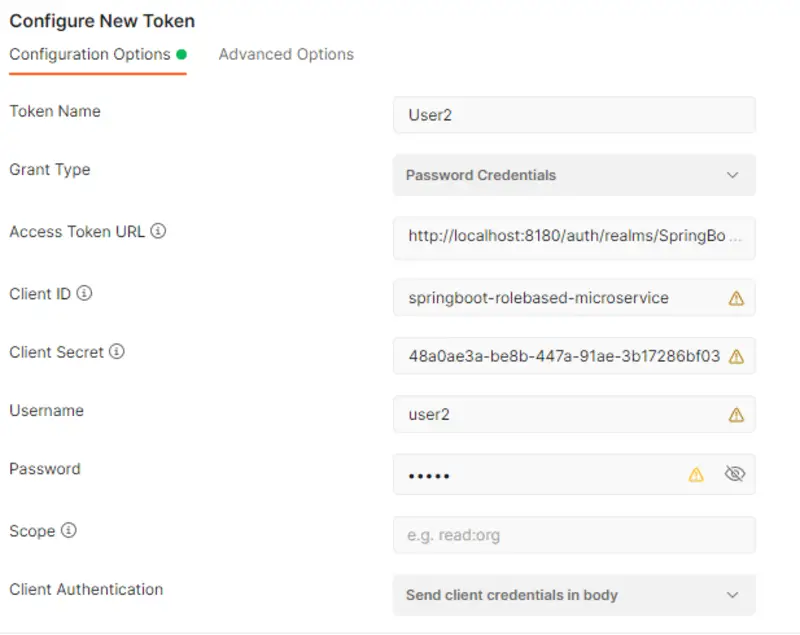
Now open Postman Client, in the Auth Tab select OAuth2.0. Here you will get an option to Configure New Token. After that, in the Configuration Options, do the following:
- Enter a token name.
- In the Grant Type field, select Password Credentials.
- Set Access Token URL to the token_endpoint value we just looked into.
- springboot-rolebased-microservice will be our Client ID.
- Set the Client Secret to the value present in the Credentials tab of the client.
- Set the Username and Password to the value of the users for whom you are generating the token.
- Leave the Scope empty.
- Set Client Authentication to Send client credentials in the body.
Now click on Get New Access Token and then Use Token.
Now we can use these tokens when we access our REST APIs. With this, we have come to the end of Keycloak related configurations, now we will move to our Spring Boot Application.
Spring Boot Application Configuration
We will proceed with the development of our Maven, Spring Boot Project for a simple use case of the Research Journal Management System.
pom.xml
This is how the pom.xml of our Spring boot Application looks like:
<?xml version="1.0" encoding="UTF-8"?>
<project xmlns="http://maven.apache.org/POM/4.0.0" xmlns:xsi="http://www.w3.org/2001/XMLSchema-instance"
	xsi:schemaLocation="http://maven.apache.org/POM/4.0.0 https://maven.apache.org/xsd/maven-4.0.0.xsd">
	<modelVersion>4.0.0</modelVersion>
	<parent>
		<groupId>org.springframework.boot</groupId>
		<artifactId>spring-boot-starter-parent</artifactId>
		<version>2.5.5</version>
		<relativePath/> <!-- lookup parent from repository -->
	</parent>
	<groupId>com.example</groupId>
	<artifactId>demo</artifactId>
	<version>0.0.1-SNAPSHOT</version>
	<name>demo</name>
	<description>Demo project for Spring Boot</description>
	<properties>
		<java.version>11</java.version>
		<keycloak.version>15.0.2</keycloak.version>
	</properties>
	<dependencies>
		<dependency>
			<groupId>org.springframework.boot</groupId>
			<artifactId>spring-boot-starter-security</artifactId>
		</dependency>
		<dependency>
			<groupId>org.springframework.boot</groupId>
			<artifactId>spring-boot-starter-web</artifactId>
		</dependency>
		<dependency>
                        <groupId>org.keycloak</groupId>
                        <artifactId>keycloak-spring-boot-starter</artifactId>
                        <version>${keycloak.version}</version>
                </dependency>

		<dependency>
			<groupId>org.springframework.boot</groupId>
			<artifactId>spring-boot-devtools</artifactId>
			<scope>runtime</scope>
			<optional>true</optional>
		</dependency>
		<dependency>
			<groupId>org.springframework.boot</groupId>
			<artifactId>spring-boot-starter-test</artifactId>
			<scope>test</scope>
		</dependency>
		<dependency>
			<groupId>org.springframework.security</groupId>
			<artifactId>spring-security-test</artifactId>
			<scope>test</scope>
		</dependency>
	</dependencies>

	<dependencyManagement>
   <dependencies>
      <dependency>
         <groupId>org.keycloak.bom</groupId>
         <artifactId>keycloak-adapter-bom</artifactId>
         <version>${keycloak.version}</version>
         <type>pom</type>
         <scope>import</scope>
      </dependency>
   </dependencies>
</dependencyManagement>

	<build>
		<plugins>
			<plugin>
				<groupId>org.springframework.boot</groupId>
				<artifactId>spring-boot-maven-plugin</artifactId>
			</plugin>
		</plugins>
	</build>

</project>
application.properties
This is how the application.properties file looks like.
- In keycloak-realm, provide the value which you have set while configuring the Keycloak.
- Provide your Client ID in keycloak-resource.
- In keycloak-credentials-secret, provide the value present in the Credentials tab of the client.
server.port                         = 8000

keycloak.realm                      = SpringBootKeycloakRoleBasedAccess
keycloak.auth-server-url            = http://localhost:8180/auth
keycloak.ssl-required               = external
keycloak.resource                   = springboot-rolebased-microservice
keycloak.credentials.secret         = 48a0ae3a-be8b-447a-91ae-3b17286bf030
keycloak.use-resource-role-mappings = true
keycloak.bearer-only                = true
KeyCloakSecurityConfiguration.java
In KeyCloakSecurityConfiguration class, you can see that /member API can only be accessed by a user who is associated with the Member role. Similarly, /admin API can only be accessed by a user who is associated with the Admin role.
The following code snippet does what is stated above.
.antMatchers("/member").hasAnyRole("Member").antMatchers("/admin").hasAnyRole("Admin")
This is how the KeyCloakSecurityConfiguration file looks like:
package com.example.demo;

import org.keycloak.adapters.springboot.KeycloakSpringBootConfigResolver;
import org.keycloak.adapters.*;
import org.keycloak.adapters.springsecurity.authentication.KeycloakAuthenticationProvider;
import org.keycloak.adapters.springsecurity.config.KeycloakWebSecurityConfigurerAdapter;
import org.springframework.beans.factory.annotation.Autowired;
import org.springframework.context.annotation.Bean;
import org.springframework.context.annotation.Configuration;
import org.springframework.security.config.annotation.authentication.builders.AuthenticationManagerBuilder;
import org.springframework.security.config.annotation.method.configuration.EnableGlobalMethodSecurity;
import org.springframework.security.config.annotation.web.builders.HttpSecurity;
import org.springframework.security.config.annotation.web.configuration.EnableWebSecurity;
import org.springframework.security.core.authority.mapping.SimpleAuthorityMapper;
import org.springframework.security.core.session.SessionRegistryImpl;
import org.springframework.security.web.authentication.session.RegisterSessionAuthenticationStrategy;
import org.springframework.security.web.authentication.session.SessionAuthenticationStrategy;

@Configuration
@EnableWebSecurity
@EnableGlobalMethodSecurity(jsr250Enabled = true)
public class KeycloakSecurityConfig extends KeycloakWebSecurityConfigurerAdapter {

	@Override
	protected void configure(HttpSecurity http) throws Exception {
		super.configure(http);
		http.authorizeRequests()

		.antMatchers("/member").hasAnyRole("Member").antMatchers("/admin").hasAnyRole("Admin").anyRequest()
		.permitAll();
		http.csrf().disable();
	}

	@Autowired
	public void configureGlobal(AuthenticationManagerBuilder auth) throws Exception {
		KeycloakAuthenticationProvider keycloakAuthenticationProvider = keycloakAuthenticationProvider();
		keycloakAuthenticationProvider.setGrantedAuthoritiesMapper(new SimpleAuthorityMapper());
		auth.authenticationProvider(keycloakAuthenticationProvider);
	}

	@Bean
	@Override
	protected SessionAuthenticationStrategy sessionAuthenticationStrategy() {
		return new RegisterSessionAuthenticationStrategy(new SessionRegistryImpl());
	}

	@Bean
	public KeycloakConfigResolver KeycloakConfigResolver() {
		return new KeycloakSpringBootConfigResolver();
	}
}
Controller
This is how our role-based access controller looks like. Here we have only made two simple GET APIs, one for Member who has subscribed for the journal and the other for the Admin of the Research Journal Management System.
package com.example.demo;

import org.springframework.http.ResponseEntity;

import org.springframework.web.bind.annotation.RequestMapping;
import org.springframework.web.bind.annotation.RequestMethod;
import org.springframework.web.bind.annotation.RestController;

@RestController

public class RoleBasedAccessController {

	@RequestMapping(value = "/member", method = RequestMethod.GET)
	public ResponseEntity<String> getMember() {
		return ResponseEntity.ok("Hello Member");
	}

	@RequestMapping(value = "/admin", method = RequestMethod.GET)
	public ResponseEntity<String> getAdmin() {
		return ResponseEntity.ok("Hello Admin");
	}

}
Testing
According to our KeyCloak Security Configuration class, the user with the role Member can access /member API, and the user with the role Admin can access /admin API. Let’s test our application using Postman.
Here the Available Token value is set to the token value of a user having a Member role and we are accessing the /member API.
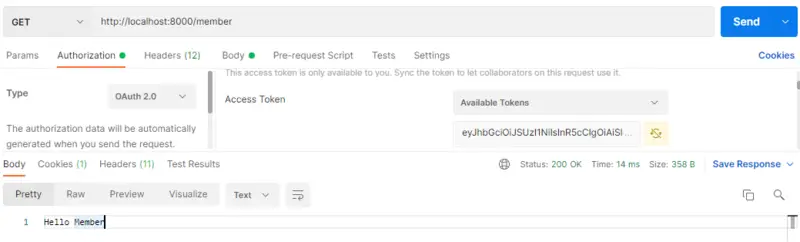
The result is as expected. Now we will try to access the same API with the Available Token value set to the token value of a user having an Admin role. Let’s see what the output is
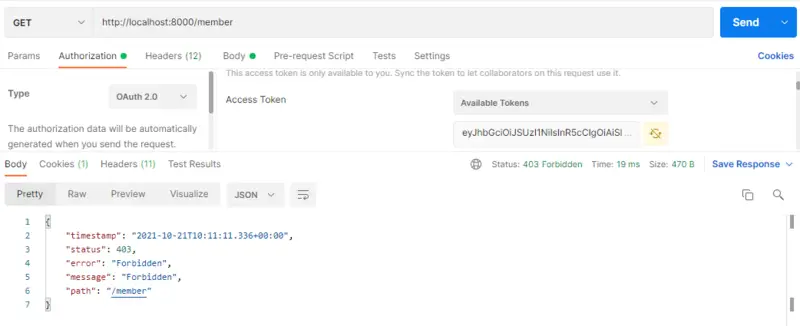
The result is as expected. The error message says that the user is FORBIDDEN to access this API.
Conclusion
With this, we have come to the end of our blog in which we have discussed Role-based Access Control to Spring Boot Rest API with Keycloak. In this article, we learned step by step configuration of Keycloak then we discussed that how we can connect our Spring Boot Application to Keycloak. We also tested our application for Role-based access control using Postman. In future blogs, we will discuss some more interesting stuff related to Keycloak Authorization Services and Spring Boot.
We hope that you liked the article. For any queries or feedback, feel free to use the comment section. If you are interested to learn more about Keycloak, check the Keycloak tutorials page on this site.
Happy Coding!