This tutorial will teach you how to use Keycloak to secure your Spring Boot Application.
To find other tutorials, check the Keycloak tutorials page.
What is Keycloak?
According to Keycloak’s official website,
It is an open-source Identity and Access Management solution aimed at modern applications and services. It makes it easy to secure applications and services with little to no code.
To get more details, visit the official site. Now let’s get started and head straight to how to use Keycloak with Spring Boot.
Keycloak Configuration
The pre-requisite step is to start Keycloak server on your computer. When the Admin user is configured, proceed to the following steps:
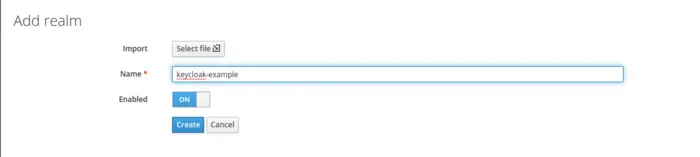
1. Create a Realm
The default Master Realm page will open after a successful login on the Keycloak console. From here, we will create a custom Realm. For this, navigate to Add Realm Button and create a new Realm.
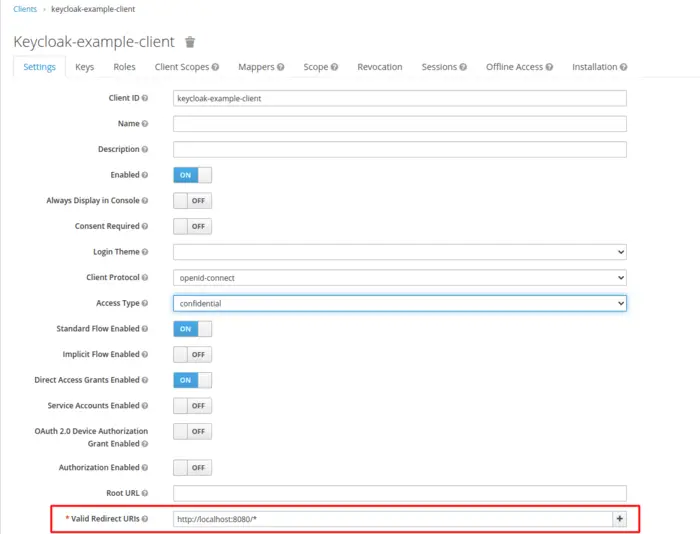
2. Create a Client
After creating a Realm, navigate to the clients’ section, and from there, we will create a new Client named keycloak-example-client. Just to mention, you can also check out this tutorial to view how to create a new Oauth2 client in Keycloak.

When we press Save Button, it will create a new client for a particular Realm. After that, we will modify some properties in the next screen. Firstly, we will change the Access Type to Confidential as it is for server-side clients that need to perform a browser login and require a client secret.
Next, we also need to update a valid redirect URI field and add a valid URL of our Application.
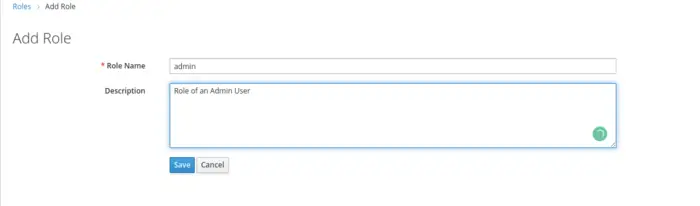
3. Create a Role
Navigate to the Roles section to add the Role. Just to mention that Keycloak offers a Role-Based Acces Control as an Authorization service, and this topic will be covered in detail in the upcoming blogs.
4. Create a User
Now that we’ve set up most of our environment for our Keycloak server, it’s time to establish a new Keycloak user, and for this, we will navigate to the Users section to add a new user.
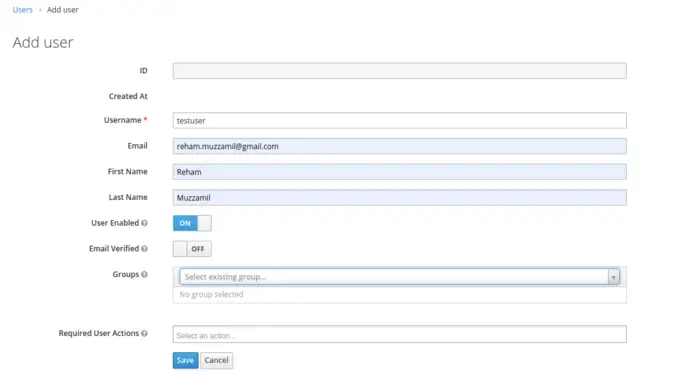
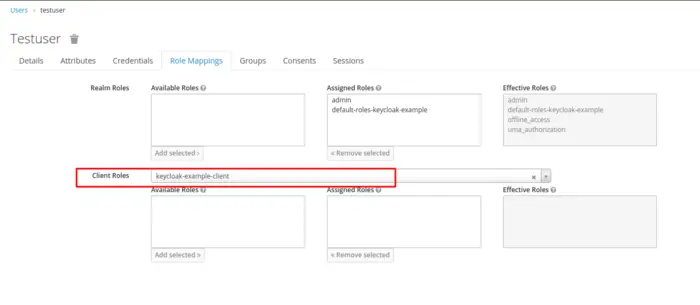
Upon saving, a new user with the username testuser will be created, and a details page will be displayed.
Now, the next step is to update the password for the user by switching to the Credentials Tab. Note that here we can also define required user actions like updating the password, verifying email, etc., at the time of first-time successful login. But, for the sake of simplicity, we will not define any required user actions.
We can also navigate the Role Mappings Tab to bind users with the relevant roles. Note that this is important if we are concerned with the Authorization Services, such as adding restrictions or limiting users to access any particular end-point based on the role. Now, we will add our user to the client we have created above.
Spring Boot Application Configuration
It’s time to get a Spring Boot Application up and running. Here we will develop a step-by-step understanding of how we can provide authentication support in our Spring Boot Application.
1. Dependencies
To use Keycloak as an authentication server, you must first add relevant dependencies to your Maven or Gradle project. For this tutorial, we’re going to use the Maven project as an example, and for that, we need to add the following dependencies to the pom.xml file:
<dependency>
    <groupId>org.keycloak</groupId>
    <artifactId>keycloak-spring-boot-starter</artifactId>
</dependency>


<dependency>
    <groupId>org.springframework.boot</groupId>
    <artifactId>spring-boot-starter-security</artifactId>
</dependency>
You can always refer to Maven Central Repository; for that, you can find the latest stable version here.
In addition to this, we also need to guarantee that the dependence is resolved successfully. For this reason, we must also add the relevant Keycloak dependency to the Dependency Management Section.
<dependencyManagement>
        <dependencies>
            <dependency>
                <groupId>org.keycloak.bom</groupId>
                <artifactId>keycloak-adapter-bom</artifactId>
                <version>13.0.0</version>
                <type>pom</type>
                <scope>import</scope>
            </dependency>
        </dependencies>
</dependencyManagement>
2. Keycloak Configuration
We need to provide certain Keycloak-specific configurations in the application. properties or application.yml file of a Spring Boot Project. In our example, we are using the Spring Boot application.properties file.
keycloak.auth-server-url = http://localhost:8180/auth/
keycloak.realm = keycloak-example
keycloak.resource = keycloak-example-client
keycloak.credentials.secret = 911a51c5-380f-4193-807a-8529011177a9
keycloak.ssl-required = external
The above configurations are quite straightforward. Here,
- Auth Server URL is the Authorization server URL of the Keycloak,
- Realm can be defined as the management unit of the Keycloak,
- The resource is the Client or the applications that use Keycloak to authenticate users,
- Credentials Secret is the secret key for Confidential clients,
- SSL Required is set to be external, meaning HTTPS is required by default for external requests.
3. Keycloak Configuration Class
Here we will begin with our task of defining a Configuration Class for the Keycloak Security Configuration. For this, we will create a package named config in our Spring Boot Application, and inside the package, we will create a new Class named KeycloakSecurityConfiguration.
A KeycloakWebSecurityConfigurerAdapter is a useful base class for constructing a WebSecurityConfigurer instance provided by Keycloak. The implementation gives us leverage to add customizations by overriding methods.
@KeycloakConfiguration
public class KeycloakSecurityConfiguration extends KeycloakWebSecurityConfigurerAdapter {

    private static final String CORS_ALLOWED_HEADERS = "origin,content-type,accept,x-requested-with,Authorization";

    private long corsMaxAge = 60;

    private static final Logger logger = LoggerFactory.getLogger(KeycloakSecurityConfiguration.class);

    @Autowired
    public void configureGlobal(AuthenticationManagerBuilder auth) {

        SimpleAuthorityMapper grantedAuthorityMapper = new SimpleAuthorityMapper();
        grantedAuthorityMapper.setPrefix("ROLE_");

        KeycloakAuthenticationProvider keycloakAuthenticationProvider =
                keycloakAuthenticationProvider();
        keycloakAuthenticationProvider.setGrantedAuthoritiesMapper(new SimpleAuthorityMapper());
        auth.authenticationProvider(keycloakAuthenticationProvider);
    }

    @Bean
    public KeycloakConfigResolver keycloakConfigResolver() {
        return new KeycloakSpringBootConfigResolver();
    }

    @Bean
    @Override
    protected SessionAuthenticationStrategy sessionAuthenticationStrategy() {
        return new RegisterSessionAuthenticationStrategy(new SessionRegistryImpl());
    }

    @Override
    protected void configure(HttpSecurity http) throws Exception {
        super.configure(http);
        logger.info("Inside configure method");
        http.cors()
                .and()
                .authorizeRequests()
                .antMatchers("/*")
                .authenticated()
                .and()
                .csrf()
                .and()
                .logout()
                .logoutRequestMatcher(new AntPathRequestMatcher("logout.do", "GET"));
    }

    @Override
    public void configure(WebSecurity web) throws Exception {
        /* @formatter:off */
        web.ignoring()
                .mvcMatchers("/js/**")
                .and()
                .ignoring()
                .mvcMatchers("/css/**")
                .and()
                .ignoring()
                .mvcMatchers("/images/**")
                .and()
                .ignoring()
                .mvcMatchers("/html/**")
                .and()
                .ignoring()
                .antMatchers(HttpMethod.OPTIONS, "/**")
                .and()
                .ignoring()
                .antMatchers("/web");
        /* @formatter:on */
    }

    @Bean
    public CorsConfigurationSource corsConfigurationSource() {
        CorsConfiguration configuration = new CorsConfiguration();
        configuration.setAllowedOrigins(Arrays.asList("*"));
        configuration.setAllowedMethods(
                Arrays.asList(GET.name(), POST.name(), PUT.name(), DELETE.name()));
        configuration.setAllowedHeaders(Arrays.asList(CORS_ALLOWED_HEADERS.split(",")));
        configuration.setMaxAge(corsMaxAge);
        UrlBasedCorsConfigurationSource source = new UrlBasedCorsConfigurationSource();
        source.registerCorsConfiguration("/**", configuration);
        return source;
    }
}
We will briefly go through the methods here:
- The @KeycloakConfiguration annotation is a metadata annotation that defines all of the annotations required to use Keycloak with Spring Security.
- configureGlobal(AuthenticationManagerBuilder auth) Registers the KeycloakAuthenticationProvider with the authentication manager.
- keycloakConfigResolver() Instead of the default Keycloak.json, use the Spring Boot properties file.
- sessionAuthenticationStrategy(): Defines the session authentication strategy.
RegisterSessionAuthenticationStrategyis used for public or confidential applications. - configure(HttpSecurity http): We define our security constraints here; it allows the configuration of web-based security at a resource level based on a selection match.
- configure(WebSecurity web): Spring Security will be omitted if you use the WebSecurity ignoring() method. None of Spring Security’s capabilities will be available if we include it in the ignoring() section.
- corsConfigurationSource(): You can define a CorsConfigurationSource bean if you want to use CORS global settings.
4. Controller Class
In this section, we will look into our Controller Class. Here, we have exposed only a single Hello World Get Mapping that is responsible for only returning a String.
@RestController
public class TestController {

    @GetMapping("/helloWorld")
    public String getHelloWorld() {
        return "Hello World!";
    }

}
Testing
Now we’re ready to test our application. To run a Spring Boot application, we can start it easily through an IDE as Spring Boot comes with an Embedded Tomcat Server.
1. Paste the URL in the browser (UI testing): To keep things simpler, we have not created an HTML or JSP page. We can directly paste our API URL into the browser window as we have exposed only a GET End-point. As a result, it will redirect us to the default login form of Keycloak as Authentication has been enabled.
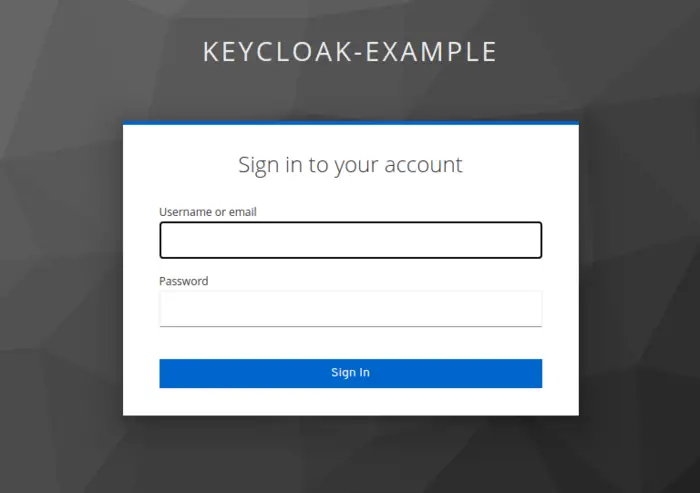
After successful login, we will get a Hello World! displayed in the browser window.
With this, we have come to the end of our tutorial. For any queries or feedback, feel free to use the comment section.
Conclusion
In this article, we have learned how to use Keycloak with Spring Boot Application. If you are interested to learn more about Keycloak, check the Keycloak tutorials page on this site.
Happy coding!