In this tutorial, we are going to see how we can use the AWS API Gateway as a trigger to an AWS Lambda function. This tutorial requires you to be familiar with building and deploying Serverless Applications with AWS Lambda.
Prerequisite: Build and Deploy a Serverless Spring Boot Web Application with AWS Lambda
Firstly, add the necessary maven dependencies into the pom.xml file.
<dependencies>
        <dependency>
            <groupId>org.springframework.boot</groupId>
            <artifactId>spring-boot-starter-web</artifactId>
        </dependency>
        <dependency>
            <groupId>org.springframework.cloud</groupId>
            <artifactId>spring-cloud-function-adapter-aws</artifactId>
        </dependency>
        <dependency>
            <groupId>com.amazonaws</groupId>
            <artifactId>aws-lambda-java-events</artifactId>
            <version>2.0.2</version>
        </dependency>
        <dependency>
            <groupId>com.amazonaws</groupId>
            <artifactId>aws-lambda-java-core</artifactId>
            <version>1.1.0</version>
        </dependency>
        <dependency>
            <groupId>org.springframework.boot</groupId>
            <artifactId>spring-boot-starter-test</artifactId>
            <scope>test</scope>
            <exclusions>
                <exclusion>
                    <groupId>org.junit.vintage</groupId>
                    <artifactId>junit-vintage-engine</artifactId>
                </exclusion>
            </exclusions>
        </dependency>
    </dependencies>
Also, add the maven shade plugin to build a shaded jar for the Spring boot application that we shall build.
<build>
        <plugins>
            <plugin>
                <groupId>org.apache.maven.plugins</groupId>
                <artifactId>maven-shade-plugin</artifactId>
                <version>3.2.4</version>
                <configuration>
                    <createDependencyReducedPom>false</createDependencyReducedPom>
                </configuration>
                <executions>
                    <execution>
                        <phase>package</phase>
                        <goals>
                            <goal>shade</goal>
                        </goals>
                    </execution>
                </executions>
            </plugin>
        </plugins>
    </build>
Next, create the AWSLambdaDemoApplication.java file which contains the main function, and paste the below code.
AWSLambdaDemoApplication.java
package com.appsdeveloperblog.aws.lambda;

import org.springframework.boot.SpringApplication;
import org.springframework.boot.autoconfigure.SpringBootApplication;

@SpringBootApplication
public class AWSLambdaDemoApplication {
    public static void main(String[] args) {
        SpringApplication.run(AWSLambdaDemoApplication.class, args);
    }
}
Now, the next step is to create a Handler. The request to this handler is routed through an object of the class APIGatewayProxyRequestEvent which is present in the com.amazonaws.services.lambda.runtime.events package. Hence, the handleRequest function takes an APIGatewayProxyRequestEvent object as the first parameter.
Create ServiceHandler.java and paste the following code into it.
ServiceHandler.java
package com.appsdeveloperblog.aws.lambda;
import com.amazonaws.services.lambda.runtime.Context;
import com.amazonaws.services.lambda.runtime.RequestHandler;
import com.amazonaws.services.lambda.runtime.events.APIGatewayProxyRequestEvent;

public class ServiceHandler implements RequestHandler<APIGatewayProxyRequestEvent, String> {

    @Override
    public String handleRequest(APIGatewayProxyRequestEvent req, Context context) {
        context.getLogger().log("Input: ");
        return "Lambda Function is invoked through the AWS API Gateway....";
    }
}
The return type of the handler function is String. It returns a String object when invoked.
We are going to verify the same at the end of the tutorial.
The next step is to build the deployment file by running the maven package command. Then, create a Lambda function and upload the jar. If you are not sure about how to do it, refer to the prerequisites section.
Adding API Gateway as the Trigger
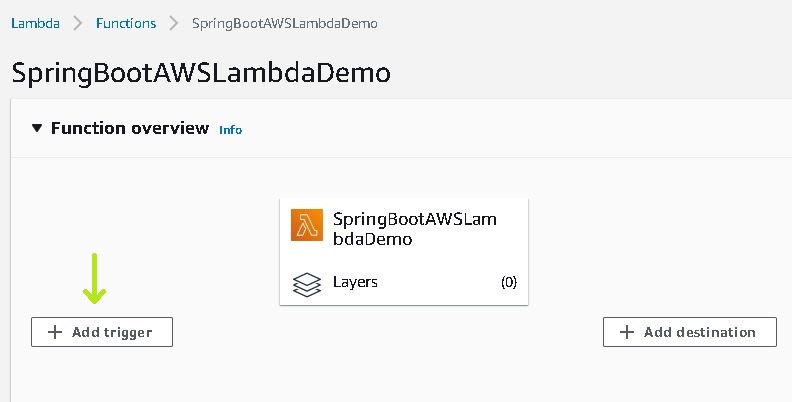
After the Lambda function is ready, we need to add a Trigger to it. A Trigger is nothing but the API Gateway. In the Function overview tab, click on ‘Add trigger’.
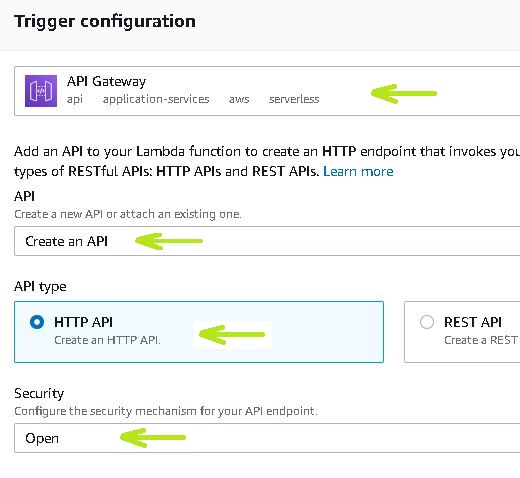
- Select API Gateway as the Trigger Configuration.
- Select ‘Create an API’ for API, ‘HTTP API’ for API Type, and
- ‘Open’ for Security.
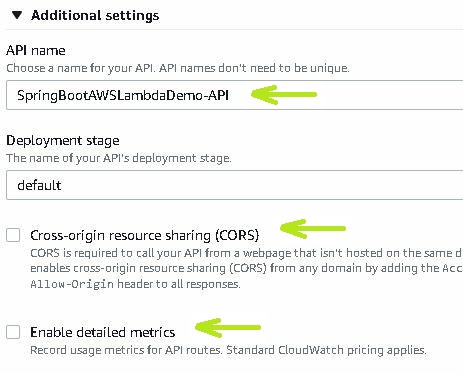
In the Additional setting tab, you can give a custom name to the Gateway API. You can also set up cross-origin resource access and enable detailed metrics. Click on Add.
Once, this is completed, click on API Gateway in the Function overview to see the list of Triggers. You can also find it in the Configuration tab -> Triggers.
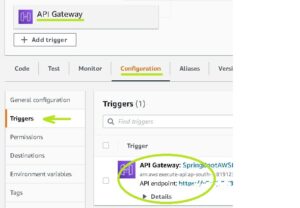
In the Trigger description, you can find the HTTP API endpoint. Click on it. A new tab opens, and displays the message ‘Lambda Function is invoked through the AWS API Gateway….’
![]()
You have now successfully triggered the Lambda function via an AWS API Gateway.
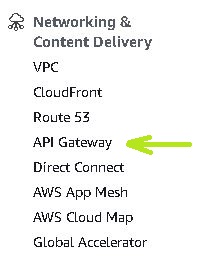
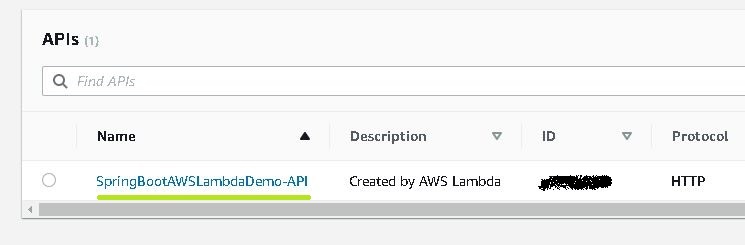
If you wish to make sure that the API Gateway has been created successfully, click on ‘Network & Content Delivery’ under ‘all services.’ Click on API Gateway. You can see the Trigger that you have just created. Click on it to see the details. You can edit it if you want.
Link to Code : GitHub
That’s it for this tutorial. Hope this has helped you. Stay tuned for more tutorials.