When writing code, we organize functionality into functions and group functions and different properties into classes. In Swift, additionally to creating classes we can also create structures or struct for short. Although very similar, Swift classes are different from swift structures.
Comparing Structures and Classes
According to Swift documentation, structures and classes in Swift have many things in common. Both can:
- Define properties to store values
- Define methods to provide functionality
- Define subscripts to provide access to their values using subscript syntax
- Define initializers to set up their initial state
- Be extended to expand their functionality beyond a default implementation
- Conform to protocols to provide standard functionality of a certain kind
Classes have additional capabilities that structures don’t have:
- Inheritance enables one class to inherit the characteristics of another.
- Typecasting enables you to check and interpret the type of a class instance at runtime.
- Deinitializers enable an instance of a class to free up any resources it has assigned.
- Reference counting allows more than one reference to a class instance.
Creating a Struct
Creating a new struct in Swift is very similar to creating a new class. Let’s define a new struct called user with a few properties.
struct User {
    let firstName: String
    let lastName: String
    var email: String
    var isActive: Bool
}
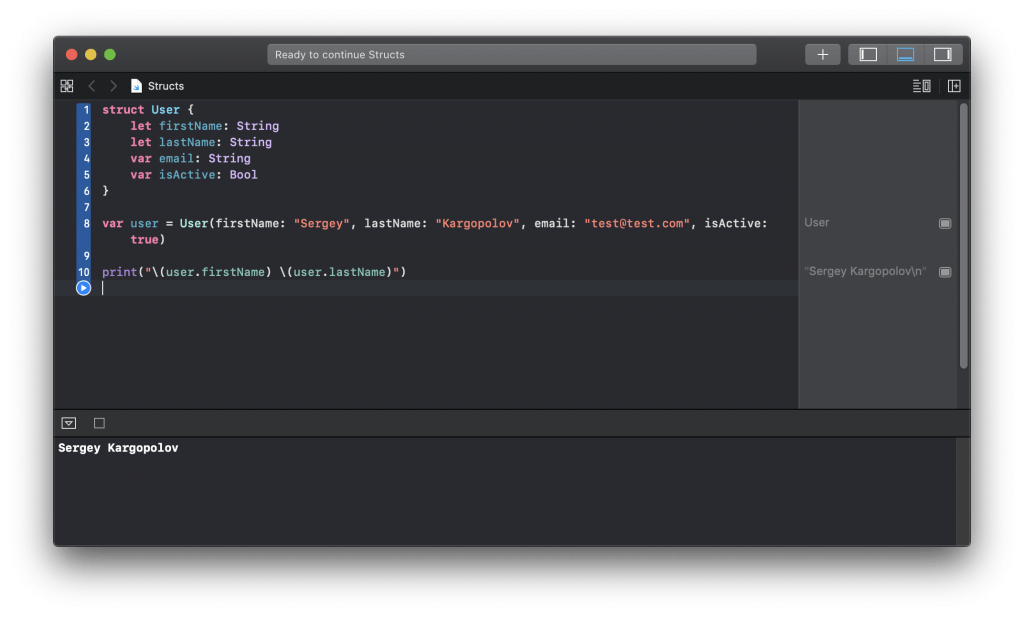
When creating a new instance of a struct, Swift will automatically create a default constructor that we can use to provide initial values to struct properties. This default constructor is called a memberwise initializer and asks to provide a value for each property when a struct is being created. To create a new instance of the above struct using a memberwise initializer we can use the following code.
var user = User(firstName: "Sergey", lastName: "Kargopolov", email: "[email protected]", isActive: true)
We can then use an instance of a created struct to access its properties and use them as needed.
print("\(user.firstName) \(user.lastName)")
Here is how the code we have written so far looks and works in the Xcode playground.
If needed we can use a created instance of a struct to access and modify the value of its variable properties. For example,
var user = User(firstName: "Sergey", lastName: "Kargopolov", email: "[email protected]", isActive: true)

print("Original email: \(user.email)")

user.email = "[email protected]"

print("New email \(user.email)")
Struct Computed Properties
Structs support computed properties. Computed properties are those properties that are created as a result of additional code execution. In the below code example, I will create a new computed property called fullName and its value will be computed based on the value of user first and last names. The code that needs to be executed to figure out the value of a computed property is provided within the curly brackets { }.
struct User {
    let firstName: String
    let lastName: String
    var email: String
    var isActive: Bool

    // Computed property
    var fullName:String {
        return "\(firstName) \(lastName)"
    }
}
We can now create an instance of the above User struct and print user full name.
var user = User(firstName: "Sergey", lastName: "Kargopolov", email: "[email protected]", isActive: true)

print("User full name: \(user.fullName)")
Notice that when creating a new instance of User struct, we did not need to supply an additional constructor parameter to initialize a value of fullName. A value of user fullName was computed by executing code provided withing the curly brackets { }.
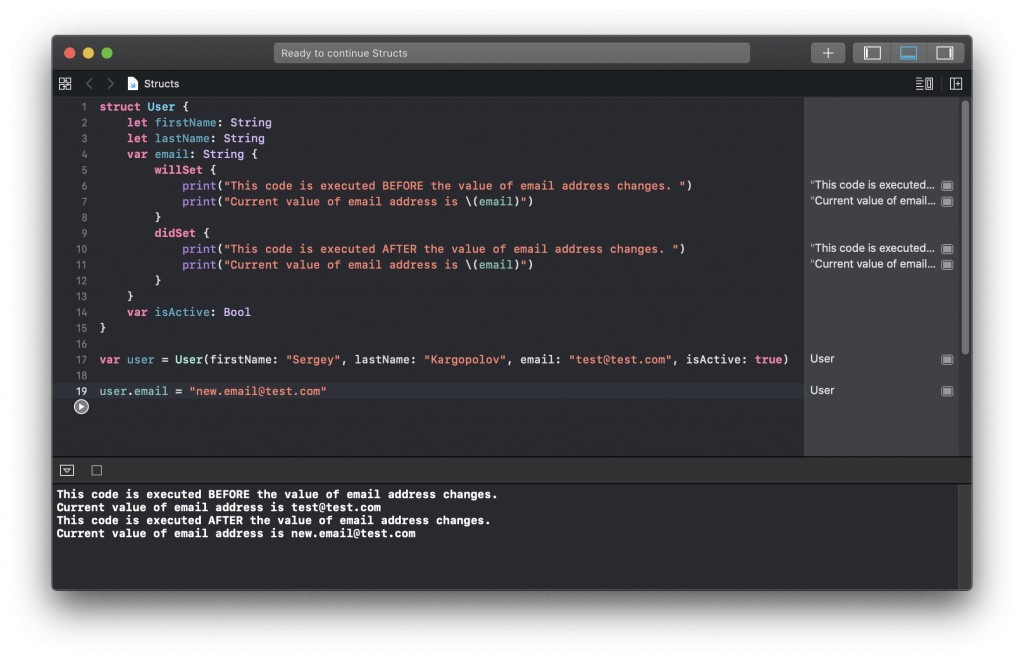
Struct Property Observers
Swift structures also allow you to create property observers. A property observer is a piece of code that is executed before or after a value of property changes.
Execute code before property value changes
To execute code before a value of property changes, we use the willSet property observer.
var email: String {
    willSet {
        print("This code is executed before the value of email address changes. ")
        print("Current value of email address is \(email)")
    }
}
Execute code after property change
To execute some code after the value of property changes, we use didSet property observer.
didSet {
    print("This code is executed AFTER the value of email address changes. ")
    print("Current value of email address is \(email)")
}
Here is how the above created observed properties look and work in my Xcode playground.
Struct Functions
Structs can also have functions and functions can access struct properties. In the code example below, I will create a new struct with one function which accesses and prints out the user’s full name.
struct User {
    let firstName: String
    let lastName: String
    var email: String
    var isActive: Bool

    func printFullName() {
        print("\(firstName) \(lastName)")
    }
}
We can now create a new instance of User struct and call the printFullName() function.
var user = User(firstName: "Sergey", lastName: "Kargopolov", email: "[email protected]", isActive: true)

user.printFullName()
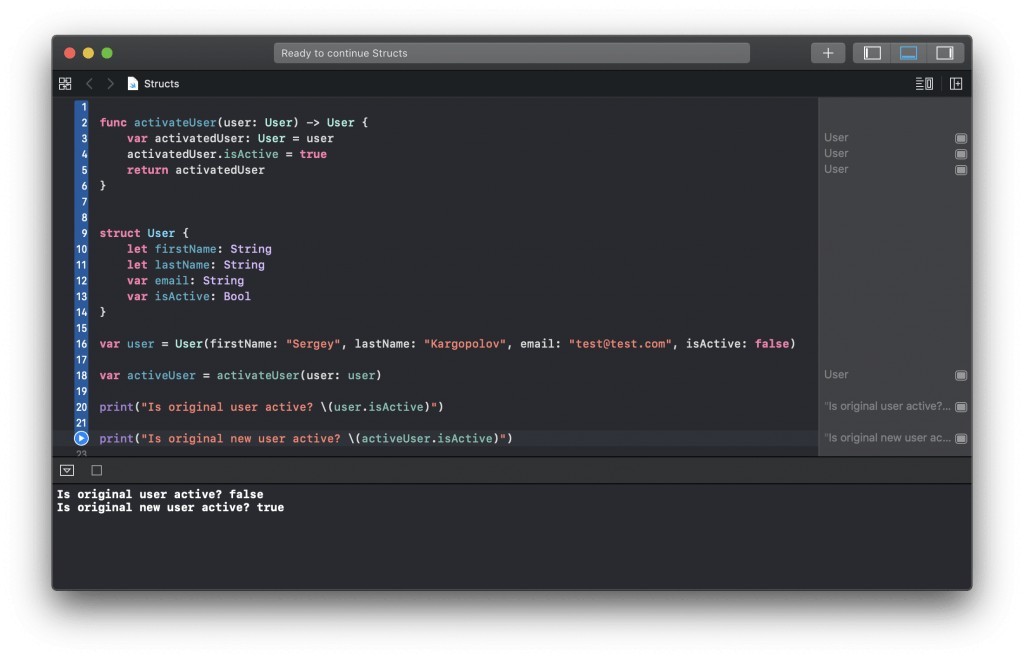
Structures Are Value Types
Structures or struct in Swift are value types. This means that if you pass a structure to a function, it will be passed as a copy rather than a reference to the original object. And if a value of one of the properties in a copied structure will be modified, the original struct will remain unaltered because the value of a property is modified only in a copied version of a struct. This is one of the biggest differences between a struct and a class. When an instance of a class is passed to a function, it is passed as a reference to an original object rather than a copy. And if the value of a property in a reference to a class object is modified, it is also modified in the original instance of an object of a class as well. Let’s have an example of a struct being passed as a parameter to a function call.
struct User {
    let firstName: String
    let lastName: String
    var email: String
    var isActive: Bool
}
A swift function that will modify a value in an instance of a copied struct. This function accepts struct as a method argument.
func activateUser(user: User) -> User {
    var activatedUser: User = user
    activatedUser.isActive = true
    return activatedUser
}
Run code and preview results:
var user = User(firstName: "Sergey", lastName: "Kargopolov", email: "[email protected]", isActive: false)

var activeUser = activateUser(user: user)

print("Is original user active? \(user.isActive)")

print("Is original new user active? \(activeUser.isActive)")
If you run the code above, the value of isActive property in an original instance of a struct will remain unchanged. Here is how this code looks and works in the Xcode playground.
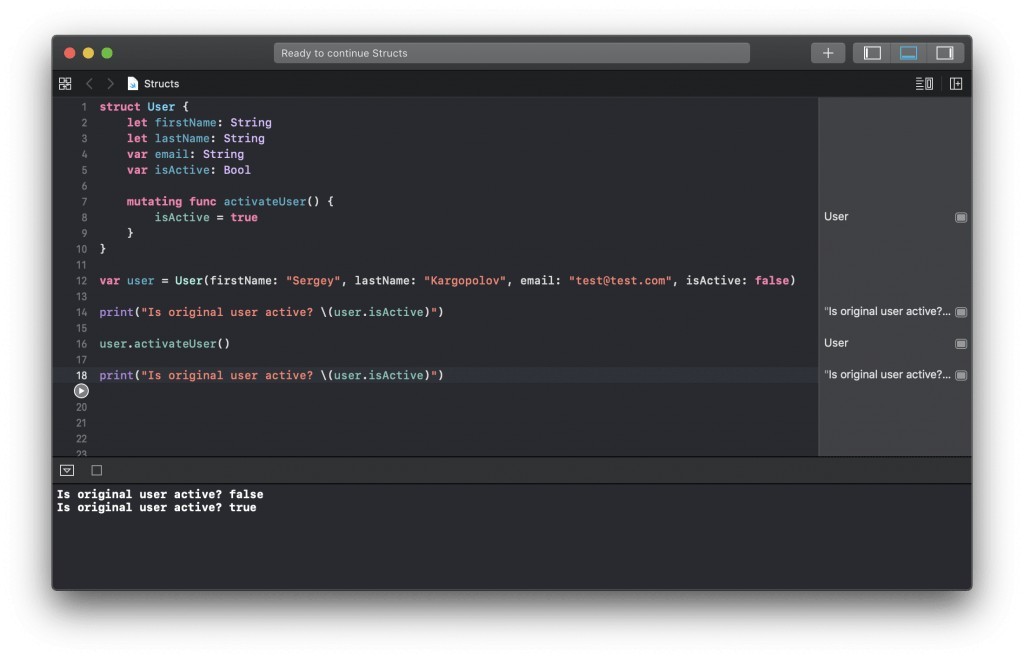
Mutating Functions in Struct
If an instance of a struct is created and its properties are initialized, then a function inside the struct cannot modify the value of struct property unless the function is marked as mutating and an instance of a struct is assigned to a variable(var) rather than a constant(let). Below is an example of a mutating function in a struct. The keyword mutating allows struct to change the value of struct property. If mutating keyword is not used then we will get the following error: “mark method ‘mutating’ to make ‘self’ mutable”
struct User {
    let firstName: String
    let lastName: String
    var email: String
    var isActive: Bool

    mutating func activateUser() {
        isActive = true
    }
}
Now let’s create an instance of the struct and try to modify one of its properties.
var user = User(firstName: "Sergey", lastName: "Kargopolov", email: "[email protected]", isActive: false)

print("Is original user active? \(user.isActive)")

user.activateUser()

print("Is original user active? \(user.isActive)")
Here is how this code looks and works in the Xcode playground.
I hope this tutorial was helpful to you. To learn more, check out other Swift tutorials in the Swift category.