In this tutorial, you will learn how to create a Navigation Drawer in Flutter. For this purpose we will follow the next steps:
- Create a new Flutter app,
- Create the Navigation Drawer,
- Example of how to use the Navigation Drawer.
1. Create a New Flutter Project
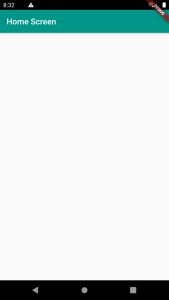
Go ahead and create a new Flutter app. If you don’t know how to create a project you can refer to the “Hello World App in Flutter” tutorial. For this tutorial, we will create two screens, one will be the Home Screen, and another one which will be Sample Screen. The Home Screen will be a widget that will return a Scaffold. As we need the App Bar to display the Navigation Drawer. This is what it will look like:
The next step is to create the Drawer.
2. Create the Navigation Drawer
Creating the Navigation Drawer is extremely easy. Practically with one line of code. The “Scaffold” widget has a built-in property “drawer” and that is all you need to create the Drawer. Have a look at the code:
class HomeScreen extends StatefulWidget {
  @override
  _HomeScreenState createState() {
    return _HomeScreenState();
  }
}

class _HomeScreenState extends State<HomeScreen> {
  @override
  Widget build(BuildContext context) {
    return Scaffold(
      drawer: Drawer(),
      appBar: AppBar(
        title: Text('Home Screen'),
        backgroundColor: Colors.teal,
      ),
      body: Center(),
    );
  }
}
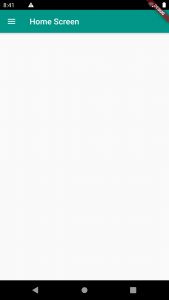
Here is what it looks like now:
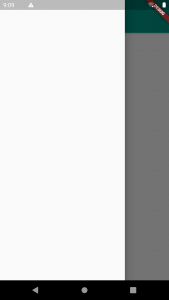
Once we press the hamburger icon the Drawer opens:
Let’s now learn how we can use the Navigation Drawer in our Flutter app.
3. Example of how to use the Navigation Drawer
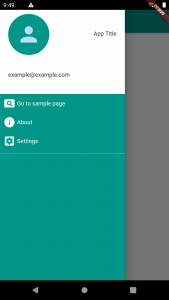
You probably have seen the Navigation Drawer in many apps. It is truly a very effective way of navigating your app. I have made a simple drawer just to display a simple UI of a drawer. Here is what it looks like:
And here is the full code for reference:
import 'package:flutter/material.dart';

void main() {
  runApp(MaterialApp(
    home: HomeScreen(),
  ));
}

class HomeScreen extends StatefulWidget {
  @override
  _HomeScreenState createState() {
    return _HomeScreenState();
  }
}

class _HomeScreenState extends State<HomeScreen> {
  @override
  Widget build(BuildContext context) {
    return SafeArea(
      child: Scaffold(
        drawer: Drawer(
          child: Container(
            color: Colors.teal,
            child: Column(
              children: [
                Container(
                  height: MediaQuery.of(context).size.height * 0.3,
                  width: MediaQuery.of(context).size.width,
                  color: Colors.white,
                  child: Stack(
                    children: [
                      Positioned(
                        top:10.0,
                        left: 20.0,
                        child: CircleAvatar(
                          radius: 50,
                          backgroundColor: Colors.teal,
                          child: Icon(
                            Icons.person,
                            size: 60,
                          ),
                        ),
                      ),
                      Positioned(
                        child: Text('[email protected]'),
                        top: 150,
                        left: 20,
                      ),
                      Positioned(
                        child: Text('App Title'),
                        top: 50,
                        right: 20,
                      ),
                    ],
                  ),
                ),
                Padding(
                  padding: const EdgeInsets.all(8.0),
                  child: Row(
                    children: [
                      Icon(
                        Icons.pageview,
                        color: Colors.white,
                        size: 30,
                      ),
                      Text(
                        ' Go to sample page',
                        style: TextStyle(color: Colors.white),
                      )
                    ],
                  ),
                ),
                Padding(
                  padding: const EdgeInsets.all(8.0),
                  child: Row(
                    children: [
                      Icon(
                        Icons.info,
                        color: Colors.white,
                        size: 30,
                      ),
                      Text(
                        ' About',
                        style: TextStyle(color: Colors.white),
                      )
                    ],
                  ),
                ),
                Padding(
                  padding: const EdgeInsets.all(8.0),
                  child: Row(
                    children: [
                      Icon(
                        Icons.settings_applications,
                        color: Colors.white,
                        size: 30,
                      ),
                      Text(
                        ' Settings',
                        style: TextStyle(color: Colors.white),
                      )
                    ],
                  ),
                ),
                Divider(
                  color: Colors.white,
                ),

              ],
            ),
          ),
        ),
        appBar: AppBar(
          title: Text('Home Screen'),
          backgroundColor: Colors.teal,
        ),
        body: Center(),
      ),
    );
  }
}
I hope this Flutter tutorial was helpful for you. If you are interested in learning Flutter, please check other Flutter tutorials on this site. Some of them have video tutorials included.
Happy learning!