If needed, it is possible to make UILabel clickable in Swift although it is recommended to use UIButton instead. To make UILabel clickable in Swift, you will need to create a UITapGestureRecognizer and then add it to a label. In this tutorial, you will learn how to create UILabel in Swift programmatically and how to make it clickable by creating and adding to it a UITapGestureRecognizer.
Create UILabel Programmatically
To create UILabel in Swift programmatically, you will need to create an instance of UILabel class, then add it as a subView to a current View. Let’s have a very simple example:
let label = UILabel()
label.frame = CGRect(x: 150, y: 150, width: 100, height: 20)
label.text = "Text on label"

view.addSubview(label)
Enable User Interaction
To make UILabel clickable you will need to enable user interaction for it. To enable user interaction for UILabel simply set the isUserInteractionEnabled property to true.
label.isUserInteractionEnabled = true
Add Gesture Recognizer
Once the user interaction is enabled for UILabel, the next step is to create and add a Gesture Recognizer which will call a custom function once user taps on a label. You can follow the following Swift code snippet to create and add the Gesture Recognizer to UILabel.
let guestureRecognizer = UITapGestureRecognizer(target: self, action: #selector(labelClicked(_:)))
label.addGestureRecognizer(guestureRecognizer)
Complete Code Example
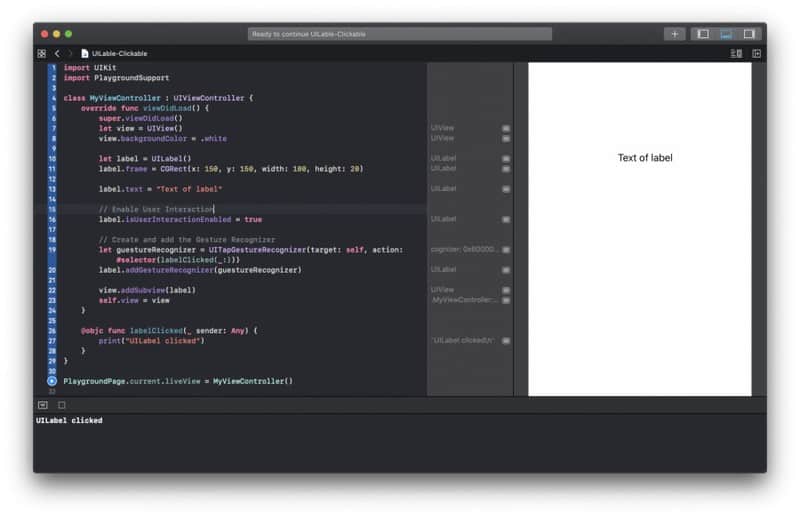
Below is a complete code example that creates a new UILabel programmatically and then creates and adds a new Gesture Recognizer for it, so that UILabel becomes clickable and when tapped a custom function is called.
class MyViewController : UIViewController {
    override func viewDidLoad() {
        super.viewDidLoad()
        let view = UIView()
        view.backgroundColor = .white

        let label = UILabel()
        label.frame = CGRect(x: 150, y: 150, width: 100, height: 20)

        label.text = "Text of label"

        // Enable User Interaction
        label.isUserInteractionEnabled = true

        // Create and add the Gesture Recognizer
        let guestureRecognizer = UITapGestureRecognizer(target: self, action: #selector(labelClicked(_:)))
        label.addGestureRecognizer(guestureRecognizer)

        view.addSubview(label)
        self.view = view
    }

    @objc func labelClicked(_ sender: Any) {
        print("UILabel clicked")
    }
}
Below is an image of how this Swift code snippet looks and works in Xcode Playground.
I hope this short tutorial, was helpful for you. Have a look at other Swift tutorials on this site and hopefully you will find even more useful code examples.