In this tutorial, we will see the steps on how to add Firebase to your Flutter App. As it happens, about 80% of the apps I have built use Firebase as a backend. It’s a great option for most apps as it gives you multiple tools that you might need from your backend. These options include but not limited to a database, storage, hosting, analytics etc. which make Firebase a PAAS. Connecting your Flutter app with Firebase is quite simple if you follow these steps:
1. Create a new flutter app
Go ahead and create a new Flutter app. If you don’t know how to create a project you can refer to the “Hello World App in Flutter” tutorial.
2. Create a new Firebase project
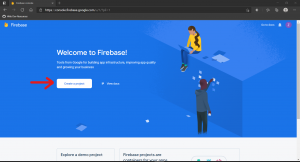
To create a new Firebase project we need to go to https://console.firebase.google.com/ and press the “Create a project button”:
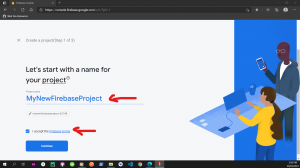
Once you press it you will be redirected to the 3 steps of creating your project. You will need to enter a project name and accept the Firebase terms to continue:
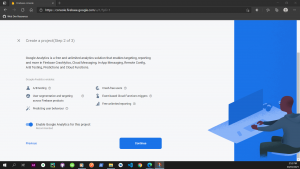
On the next screen, you will be asked if you want to enable Google Analytics, you can choose to enable or not, if you choose not to you can always enable them later on:
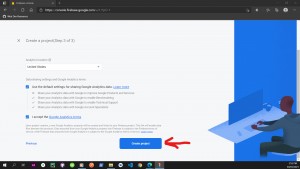
Finally, choose your analytics location, accept the terms and create the project:
It will take a few second to create the project but once done you will be redirected to the project overview page:
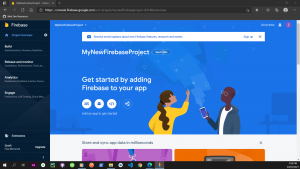
We now have our Firebase project to which we will connect our app. The next step will be to register our app.
3. Register your app
As you can see on your project overview screen you can add iOS, Android, Website, and even Unity projects. We will add an Android app. Press the Android icon and it will take you to the screen where you can add Firebase to your app.
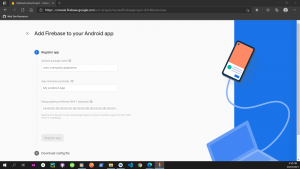
In the field Android package name, you will need to insert your application ID which you can find in your app manifest. To get the ID to go to your “android” folder, then to the “app” folder, then “src” folder and finally, in the profile folder you have the “AndroidManifest.xml” file:
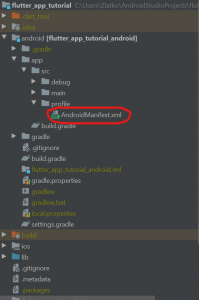
Open the file and inside you will find your package name:
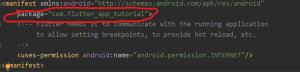
this is the name we will enter in the field. The other two fields are optional so you don’t have to provide any input. Once you press the register button, the next step will be to download the config file. Press the button and download the file.
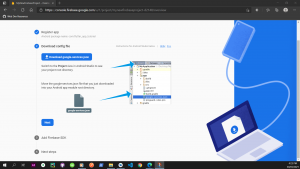
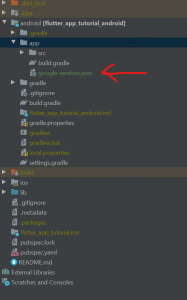
This is a “.json” file that you need to paste in your “android” folder in the root of the app folder:
Press on the Next button and we will need to complete our last step which is adding the Firebase SDK.
4. Add Firebase SDK
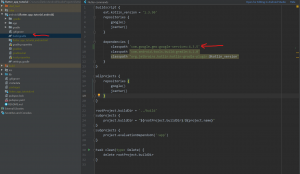
To add the Firebase SDK we will need to copy and paste some code from Firebase in our app code. Let’s get started. In your project-level “build.gradle” file add the following code under dependencies:
classpath 'com.google.gms:google-services:4.3.5'
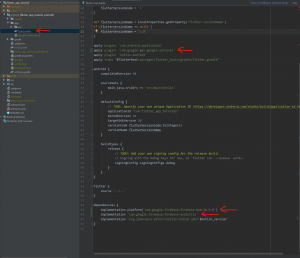
Close this file, and open the “app” folder level build.gradle and add the following code:
// Add this just below the others
apply plugin: 'com.google.gms.google-services'
// Add this under dependencies
    implementation platform('com.google.firebase:firebase-bom:26.8.0')
    implementation 'com.google.firebase:firebase-analytics'
Once this is done you already have Firebase added to your app. It’s a good practice to run “flutter clean” in your app and restart your app to make sure the configuration is in place. Once you have Firebase in your app you can utilize all of the Firebase features. My favorite features are the authentication and the databases, and there are a lot of helpful packages that you can utilize to work with Firebase.
I hope this Flutter tutorial was helpful for you. If you are interested in learning Flutter, please check other Flutter tutorials on this site. Some of them have video tutorials included.
Happy learning Flutter!