In this tutorial, you will learn how to start up your own Spring Cloud API Gateway and how to make it route HTTP Requests sent to a registered with Eureka Discovery Server Microservice. I will also show you how to register more than one Spring Boot Microservice with Eureka and how to configure your Spring Cloud API Gateway to route HTTP Requests to more than one Microservice.
To be able to follow this tutorial, you will need to have or create at least three Spring Boot projects:
- Eureka Discovery Server,
- Spring Boot Microservice,
- Spring Cloud API Gateway.
Let’s start by creating a new Eureka Discovery Server.
For a step-by-step series of video lessons, please check this page: Spring Boot Microservices and Spring Cloud.
Start Eureka Discovery Server
Since this tutorial is about Spring Cloud API Gateway, I will not go into detail here on how to create your own Eureka Discovery Server. Please follow this short tutorial I created earlier to learn how to create and run a very simple Eureka Discovery Server.
Below are the details of my Eureka Discovery Server, which I have created for this tutorial.
Main Application Java Class
package com.appsdeveloperblog.photoapp.discovery.PhotoAppDiscoveryService;

import org.springframework.boot.SpringApplication;
import org.springframework.boot.autoconfigure.SpringBootApplication;
import org.springframework.cloud.netflix.eureka.server.EnableEurekaServer;

@SpringBootApplication
@EnableEurekaServer
public class PhotoAppDiscoveryServiceApplication {
 public static void main(String[] args) {
  SpringApplication.run(PhotoAppDiscoveryServiceApplication.class, args);
 }
}
Eureka Server application.properties File
server.port=8010
spring.application.name=PhotoAppApi-eureka-server
eureka.client.registerWithEureka=false
eureka.client.fetchRegistry=false
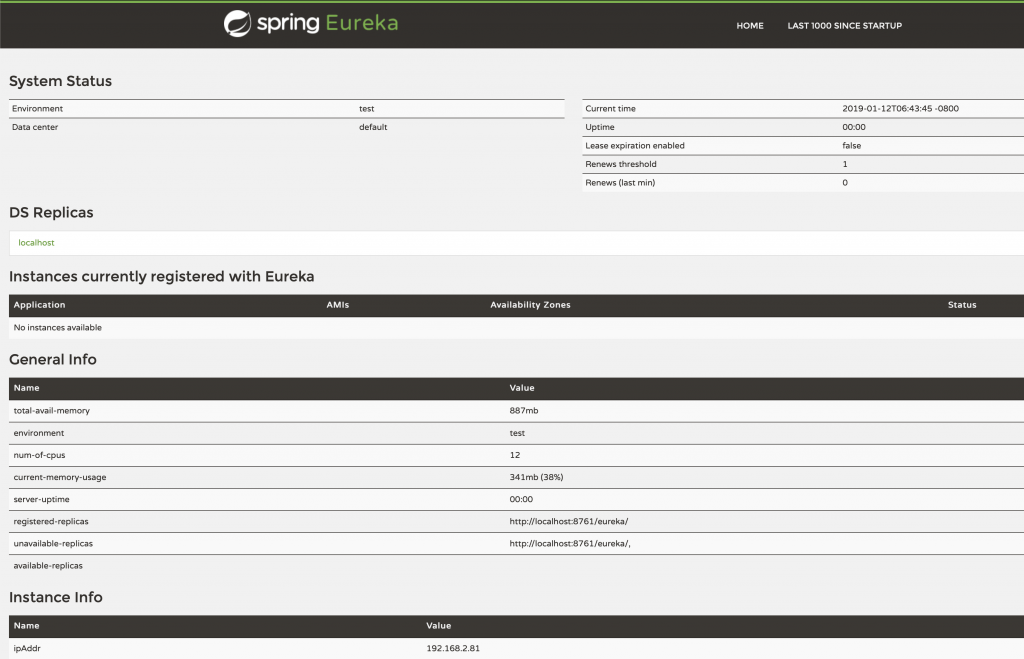
Start up Eureka Discovery Service and open its URL in the browser window. In the application.properties file above, I have configured port 8010 to be used for my Eureka server. So the URL I need to open is:
http://localhost:8010
Start Spring Boot Microservice
The Spring Cloud Gateway we will create in this tutorial will route HTTP Requests sent to a registered with Eureka Microservice. You might already have one or more Spring Boot Microservices created, but if you do not, please follow this tutorial on how to register your Microservice with Eureka Discovery Server.
Below are the details of the Spring Boot Microservice I have created for this tutorial.
Main Application Java class
package com.appsdeveloperblog.photoapp.api.users;

import org.springframework.boot.SpringApplication;
import org.springframework.boot.autoconfigure.SpringBootApplication;
import org.springframework.cloud.client.discovery.EnableDiscoveryClient;

@SpringBootApplication
@EnableDiscoveryClient
public class PhotoAppApiApplication {

 public static void main(String[] args) {
  SpringApplication.run(PhotoAppApiApplication.class, args);
 }

}
Users Microservice application.properties File
eureka.client.serviceUrl.defaultZone = http://localhost:8010/eureka
server.port=0
spring.application.name=PhotoAppApi-Users
Users Microservice Rest Controller Class
package com.appsdeveloperblog.photoapp.api.users.io.controllers;

import org.springframework.web.bind.annotation.GetMapping;
import org.springframework.web.bind.annotation.RequestMapping;
import org.springframework.web.bind.annotation.RestController;

@RestController
@RequestMapping("/users")
public class UsersController {

    @GetMapping("/status/check")
    public String status() {
        return "Working";
    }
}
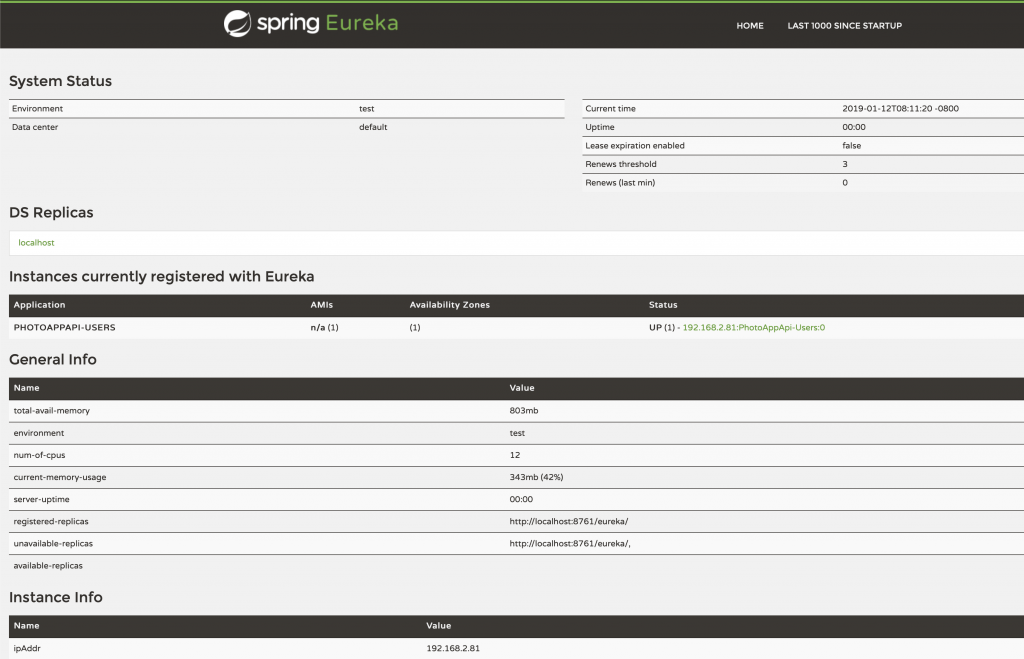
Start up your Spring Boot Microservice. If you have configured it to register with Eureka Discovery Server, as I have done in the example above, then your Microservice should register with Eureka successfully. Refresh the Eureka page, and it should now have your Spring Boot Microservice listed.
Create Spring Cloud API Gateway
It is time to create a Spring Cloud API Gateway. To create a new Spring Cloud API Gateway, we first need to create a very simple Spring Boot Web Service. I always create Spring Boot Web Services using the Spring Initializr project page. Go ahead and create a new Spring Boot Web Service project or follow this step-by-step video tutorial to create a new Spring Boot Microservice.
Spring Cloud API Gateway Dependencies
Once you have your very simple Spring Boot Web project created, open its POM.xml file and add the following details:
The dependenyManagement section
    <dependencyManagement>
        <dependencies>
            <dependency>
                <groupId>org.springframework.cloud</groupId>
                <artifactId>spring-cloud-dependencies</artifactId>
                <version>${spring-cloud.version}</version>
                <type>pom</type>
                <scope>import</scope>
            </dependency>
        </dependencies>
    </dependencyManagement>
Gateway Starter and Eureka Client dependencies
<dependency>
    <groupId>org.springframework.cloud</groupId>
    <artifactId>spring-cloud-starter-gateway</artifactId>
</dependency>

<dependency>
    <groupId>org.springframework.cloud</groupId>
    <artifactId>spring-cloud-starter-netflix-eureka-client</artifactId>
</dependency>
The repositories Element
<repositories>
    <repository>
        <id>spring-milestones</id>
        <name>Spring Milestones</name>
        <url>https://repo.spring.io/milestone</url>
    </repository>
</repositories>
The properties Element
<properties>
    <java.version>1.8</java.version>
    <spring-cloud.version>Greenwich.RC2</spring-cloud.version>
</properties>
Below is the complete POM.XML of my working project
<?xml version="1.0" encoding="UTF-8"?>
<project xmlns="http://maven.apache.org/POM/4.0.0" xmlns:xsi="http://www.w3.org/2001/XMLSchema-instance"
         xsi:schemaLocation="http://maven.apache.org/POM/4.0.0 http://maven.apache.org/xsd/maven-4.0.0.xsd">
    <modelVersion>4.0.0</modelVersion>
    <parent>
        <groupId>org.springframework.boot</groupId>
        <artifactId>spring-boot-starter-parent</artifactId>
        <version>2.1.2.RELEASE</version>
        <relativePath/> <!-- lookup parent from repository -->
    </parent>
    <groupId>com.appsdeveloperblog.photoapp.gateway</groupId>
    <artifactId>ApiGateway</artifactId>
    <version>0.0.1-SNAPSHOT</version>
    <name>ApiGateway</name>
    <description>Demo project for Spring Boot</description>

    <properties>
        <java.version>1.8</java.version>
        <spring-cloud.version>Greenwich.RC2</spring-cloud.version>
    </properties>

    <dependencies>

        <dependency>
            <groupId>org.springframework.boot</groupId>
            <artifactId>spring-boot-starter-actuator</artifactId>
        </dependency>

        <dependency>
            <groupId>org.springframework.cloud</groupId>
            <artifactId>spring-cloud-starter-gateway</artifactId>
        </dependency>

        <dependency>
            <groupId>org.springframework.cloud</groupId>
            <artifactId>spring-cloud-starter-netflix-eureka-client</artifactId>
        </dependency>

        <dependency>
            <groupId>org.springframework.boot</groupId>
            <artifactId>spring-boot-starter-test</artifactId>
            <scope>test</scope>
        </dependency>
    </dependencies>

    <dependencyManagement>
        <dependencies>
            <dependency>
                <groupId>org.springframework.cloud</groupId>
                <artifactId>spring-cloud-dependencies</artifactId>
                <version>${spring-cloud.version}</version>
                <type>pom</type>
                <scope>import</scope>
            </dependency>
        </dependencies>
    </dependencyManagement>

    <build>
        <plugins>
            <plugin>
                <groupId>org.springframework.boot</groupId>
                <artifactId>spring-boot-maven-plugin</artifactId>
            </plugin>
        </plugins>
    </build>

    <repositories>
        <repository>
            <id>spring-milestones</id>
            <name>Spring Milestones</name>
            <url>https://repo.spring.io/milestone</url>
        </repository>
    </repositories>

</project>
Spring Cloud API Gateway Application.properties File
There are a few configuration properties you will need to add to either application.properties file or to a bootstrap.yml file. Below is an example of application.properties file
Open application.properties file of your Spring Cloud API Gateway and add the following details.
server.port=8080
eureka.client.serviceUrl.defaultZone = http://localhost:8010/eureka
spring.application.name=ApiGateway
spring.cloud.gateway.discovery.locator.lower-case-service-id=true

spring.cloud.gateway.routes[0].id=users
spring.cloud.gateway.routes[0].uri=lb://PHOTOAPPAPI-USERS/users
spring.cloud.gateway.routes[0].predicates[0]=Path=/users/**
We use spring.cloud.gateway.routes to configure Spring Cloud API Gateway to route HTTP Requests sent to /users/** to a Microservice URI lb://PHOTOAPPAPI-USERS/users which is registered with Eureka Server.
Where:
- PHOTOAPPAPI-USERS – is the name of our Microservice application registered with Eureka Discovery Server. This name appears in the list of applications registered with Eureka Server under the Application column.
- lb:// – stands for Load Balancer or Load Balanced.
Spring Cloud API Gateway bootstrap.yml File
YAML file can also be used to provide configuration details for your Spring Cloud API Gateway. If you choose to use YAML instead of application.properties file, create a new file called bootstrap.yml and place it next to the application.properties file, which is located in src/main/resources folder. Add the following details to your bootstrap.yaml file.
Because this is the only Microservice I have in this example, I will define only one route. The YAML file below contains only one route, configuring our API Gateway to route an HTTP Request sent to a path /users/** to a Microservice registered with the Eureka Server has the name PHOTOAPPAPI-USERS. The lb:// stands for Load Balanced.
server:
  port: 8080
eureka:
  client:
    serviceUrl:
      defaultZone: http://localhost:8010/eureka
spring:
  application:
    name: ApiGateway
  cloud.gateway:
    discovery:
      locator:
        enabled: true
        lowerCaseServiceId: true
    routes:
    - id: users
      uri: lb://PHOTOAPPAPI-USERS
      predicates:
        - Path=/users/**
The routes: part of the YAML file above defines the route which will be used to make our API Gateway to route all requests sent to /users/** to a Microservice URI lb://PHOTOAPPAPI-USERS/users which is registered with Eureka Server.
Where:
- PHOTOAPPAPI-USERS – is the name of our Microservice application registered with Eureka Discovery Server. This name appears in the list of applications registered with Eureka Server under the Application column,
- lb:// – stands for Load Balancer or Load Balanced.
Define More Than One Route
If you have two Microservices registered with Eureka Service and need to create more than one API route, then here is how to do it.
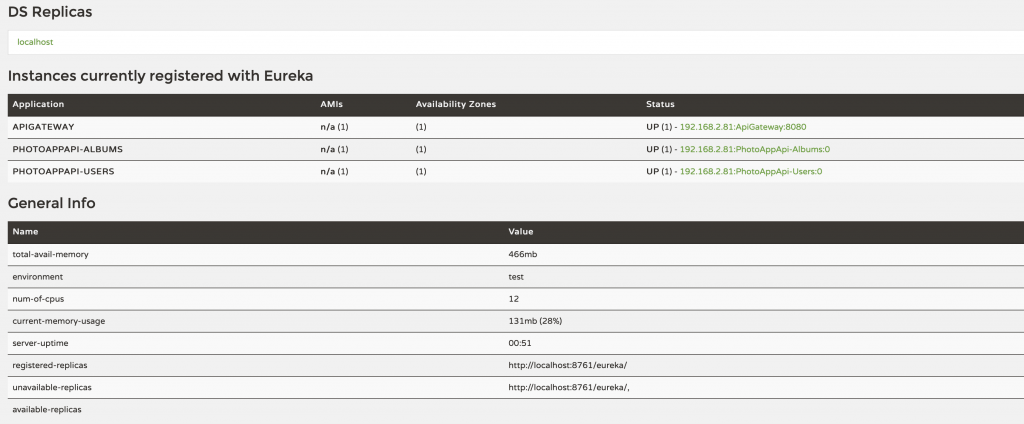
Let’s assume we have a second Microservice registered with our Eureka Service with the name PHOTOAPPAPI-ALBUMS. Below is an image of my Eureka page with two Microservices registered:
- PHOTOAPPAPI-USERS and
- PHOTOAPPAPI-ALBUMS
To create routes for the two above-mentioned Microservices, my YAML file will look like the one below:
server:
  port: 8080
eureka:
  client:
    serviceUrl:
      defaultZone: http://localhost:8010/eureka
spring:
  application:
    name: ApiGateway
  cloud.gateway:
    discovery:
      locator:
        enabled: true
        lowerCaseServiceId: true
    routes:
    - id: users
      uri: lb://PHOTOAPPAPI-USERS
      predicates:
        - Path=/users/**
    - id: albums
      uri: lb://PHOTOAPPAPI-ALBUMS
      predicates:
        - Path=/albums/**
I hope this tutorial was helpful to you.
If you are interested in learning more about Spring Cloud and enjoy learning by following a series of step-by-step video lessons, then look at the list of video courses listed below. One of them might be what you were looking for.