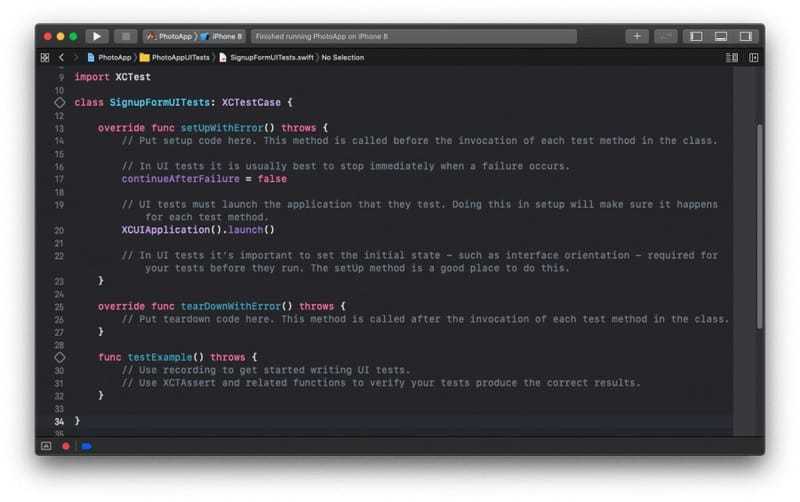
When we create a new UI Test Case class, Xcode will create a new Swift class that already contains some structure. The new UI Test Case class will extend the XCTestCase class and will already have a few default methods created.
Below is a default template of a new UI Test Case class.
If you are interested in video lessons on how to write Unit tests and UI tests to test your Swift mobile app, check out this page: Unit Testing Swift Mobile App
UI Test Case Class Default Template
The below UI Test Case class was created with an XCode Version 11.4 (11E146).
Notice that the template class already has three default methods:
- override func setUpWithError() throws –This method is called before the invocation of each test method in the class. UI tests must launch the application that they test. Doing this in the setUpWithError() method will make sure it happens for each test method.
- override func tearDownWithError() throws – This method is called after the invocation of each test method in the class.
- func testExample() throws – An example test method. This method is empty and does not contain any UI testing code.
import XCTest

class SignupFormUITests: XCTestCase {

    override func setUpWithError() throws {
        // Put setup code here. This method is called before the invocation of each test method in the class.

        // In UI tests it is usually best to stop immediately when a failure occurs.
        continueAfterFailure = false

        // UI tests must launch the application that they test. Doing this in setup will make sure it happens for each test method.
        XCUIApplication().launch()

        // In UI tests it’s important to set the initial state - such as interface orientation - required for your tests before they run. The setUp method is a good place to do this.
    }

    override func tearDownWithError() throws {
        // Put teardown code here. This method is called after the invocation of each test method in the class.
    }

    func testExample() throws {
        // Use recording to get started writing UI tests.
        // Use XCTAssert and related functions to verify your tests produce the correct results.
    }

}
Set Application Initial State
The setUpWithError() method is also a good place to set the initial state – such as interface orientation – required for your tests before they run. Below is an example of how to do it.
To set an initial state of application under test to a Portrait mode, use UIDeviceOrientation.portrait
let device = XCUIDevice.shared
device.orientation = .portrait
Below is a complete list of device orientation modes that can be used:
- UIDeviceOrientation.portrait – Device oriented vertically, the home button on the bottom
- UIDeviceOrientation.portraitUpsideDown – Device oriented vertically, the home button on the top
- UIDeviceOrientation.landscapeLeft– Device oriented horizontally, the home button on the right
- UIDeviceOrientation.landscapeRight -Device oriented horizontally, the home button on the left
- UIDeviceOrientation.faceUp – Device oriented flat, face up
- UIDeviceOrientation.faceDown – Device oriented flat, face down
