In Flutter, Tooltip widget is a material design tooltip used to let users know about the functionality of a button or a widget in general.
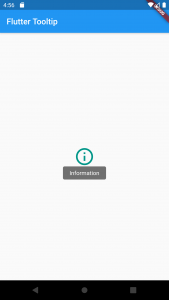
When a widget is equipped with a tooltip, if you long-press the widget, the tooltip appears as a label that floats.
Tooltip is usually used to increase the accessibility of the app and provide text based hints for widgets.
Creating Flutter Tooltip
The Tooltip widget is a parent widget by default. It has a list of parameters that help you create the Tooltip. Those properties are message, child, padding, preferBelow, margin, height, textStyle, decoration etc. Below is a very simple code example in Flutter that creates a Tooltip that’s wraps a FlatButton:
child: Tooltip(
  message: 'Information',
  child: FlatButton(
    child: Icon(
      Icons.info_outline,
      size: 50,
      color: Colors.teal,
    ),
  ),
),
Flutter Tooltip Example
Below is a complete code example of a very simple app built with Flutter. It sets a tooltip on a button. To provide a Tooltip for a button, what you need to do is to surround the button with the Tooltip widget.
In the code example below, we use a FlatButton with Icon as a child which will be our visual object. We will then surround the button with the Tooltip. So, if you long press on the button, you will see a label with the message provided for the Tooltip widget.
import 'package:flutter/material.dart';

void main() {
  runApp(MyApp());
}

class MyApp extends StatefulWidget {
  @override
  _MyAppState createState() => _MyAppState();
}

class _MyAppState extends State<MyApp> {
  @override
  Widget build(BuildContext context) {
    return MaterialApp(
      home: Scaffold(
        appBar: AppBar(
          title: Text('Flutter Tooltip'),
        ),
        body: Center(
          child: Tooltip(
            message: 'Information',
            child: FlatButton(
              minWidth: 100,
              child: Icon(
                Icons.info_outline,
                size: 50,
                color: Colors.teal,
              ),
            ),
          ),
        ),
      ),
    );
  }
}
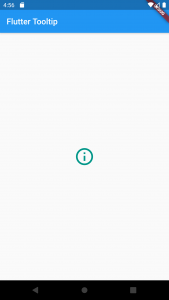
If you build and run the above code example you should have an app that looks and works as illustrated with the images below.

Tooltip with a message will display when you long-press on the button.

I hope this Flutter tutorial on Tooltip was helpful to you. If you are interested in learning Flutter, please check other Flutter tutorials on this site. Some of them have video tutorials included.
Happy learning!