This blog post will give you a brief introduction to a Test-Driven Development(TDD) in Swift and will demonstrate how you can create a very basic Unit test in Swift to test a User Model Struct that holds the details of the Account Registration form.
Assume that you need to follow the Test-Driven development approach to implement the basic form validation logic. You will need to implement a class or a struct to hold the provided user details and implement basic validation logic to make sure that the provided details are valid.
What is Test-Driven Development?
Test-Driven Development is a way of structuring your development process. If not following the Test-Driven Development approach, developers will first write an app code and only then, when the app code is written, they will write unit tests to test it. In the test-driven development, you first write a unit test, and then you write the app code to make that unit test pass.
When following test-driven development to write your code, you will follow 4 important steps that define the TDD life cycle: Red, Green, Refactor, Repeat.
Red
The very first step in Test Driven Development is called Red. It is called red because the color of a failed unit test in Xcode is red. At this step, before writing any app code, we first need to write a unit test. The test will fail because there is no app code that it can test. This is why it fails and this is why it will be Red. Once we have a failing unit test, the next step will be to write an app code to make this test pass. This is why in TDD, the development of app code starts with writing a Unit test and this is why it is called Test-Driven Development.

Green
The next step in the Test-Driven Development life cycle is called Green, and it is called Green because the color of a passing test in Xcode is green. At this step we need to write an app code, to make our earlier written and failing unit test pass. Once the unit test passes its color in Xcode will turn to green and we can continue to the next step in TDD cycle which is Refactor.

Refactor
This step is called Refactor because at this step we need to clean up both our Unit test and the app code for it to look and work nice. Anything that we see can be improved at this very step of unit testing and the app feature development can be done at this step. You can double-check how your test methods and object variables are called, see if there is any code that is repeated and can be reused or improved.
Repeat
The final step in the Test-Driven Development life cycle is called repeat. This means that we need to pick up a new app feature and implement it by repeating the previous three steps: First write a new unit test that will fail, second write app code to make the test pass and third, refactor Unit test code and app code to make it look and work well.
How that you know the steps to follow when writing unit tests, let’s have at a very simple example of a Unit test that validates registration form data.
Create a New Xcode Project
I will start by creating a very new Xcode project. There is nothing special in the way we create a new Xcode project for this example, except for one thing: we need to make sure that Unit testing is enabled for our project.
To enable Unit tests when creating a new Xcode project make sure you check the checkbox with a label “Include Unit Tests”. If you are not going to create UI Tests then no need to select “Include UI Tests” checkbox. You can always enable UI Tests for your project later.

Create a New Unit Test Class
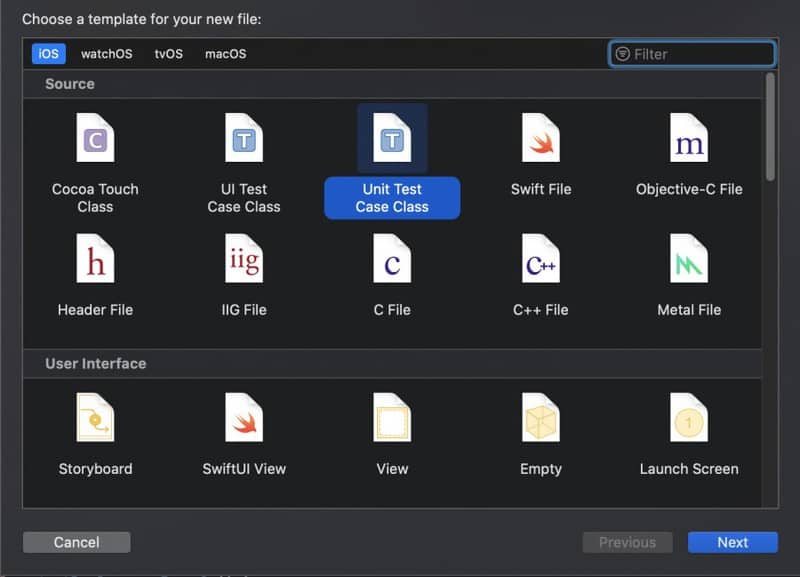
Once you have a new Xcode project created and Unit Tests enabled, you can create a new Unit test class. To do that, select File->New File and then search for Unit Test Case Class.

Existing Project with No Unit Tests Target
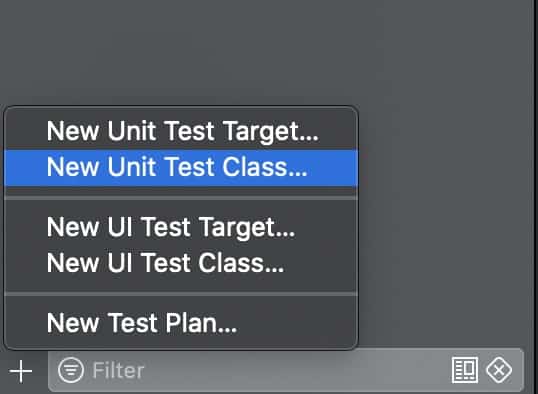
If you already have an existing Xcode project with no Unit tests and not Unit tests target created, you can always create a new Unit test Target and a Unit test class from Xcode Test Navigator.
- Switch to Test Navigator

2. Create a new Unit Test Target and Unit Test Class

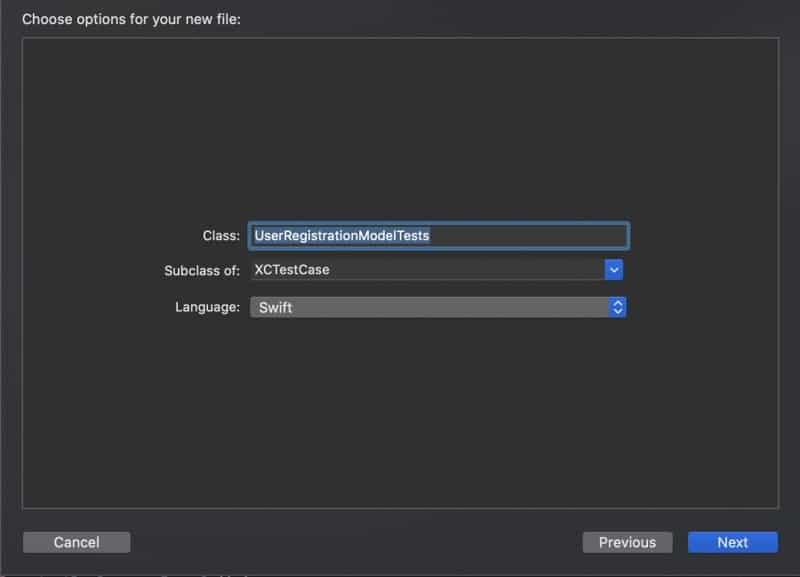
I will give my new Unit Test Class a name “UserRegistrationModelTests” as it is on the image below.

Once you have a new Unit Test class created it will already have some basic setup. The two important methods that we want in this class are the setUp() method and the tearDown() method. The other two methods: testExample() and testPerformanceExample() can be deleted. Below is how my new Unit Test Class looks after I have deleted the two not very important methods.
import XCTest
@testable import PhotoApp

class PhotoAppTests: XCTestCase {

    override func setUp() {
        // Put setup code here. This method is called before the invocation of each test method in the class.
    }

    override func tearDown() {
        // Put teardown code here. This method is called after the invocation of each test method in the class.
    }
}
We can now write our very first Unite Test method.
Step 1. Create a Failing Unit Test
If I want to follow the Test-Driven development approach I first need to create a Unit Test method that fails. Also, it is a good practice to write a minimum amount of code. Just enough for a test method to fail.
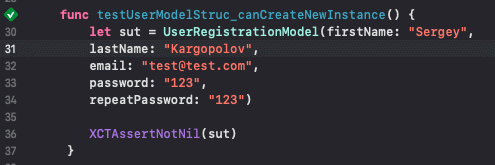
Note that the name of the test method must start with a test prefix. For example: testUserModelStruc_canCreateNewInstance().
    func testUserModelStruc_canCreateNewInstance() {
        let sut = UserRegistrationModel(firstName: "Sergey",
        lastName: "Kargopolov",
        email: "[email protected]",
        password: "123",
        repeatPassword: "123")

        XCTAssertNotNil(sut)
     }
If I attempt to run this test method it will fail for sure because I have not created yet a UserRegistrationModel struct.

Step 2. Write App Code to Make Test Method Pass
Now is the time to write an app code to make the test method pass. To make my test method compile I will need to create a new class or a struct called UserRegistrationModel with 5 properties: firstName, lastName, email, password, and repeatPassword. Note, that this new class should not be created in the Unit Tests target but in your main app project folder. Let’s do that.

import Foundation

struct UserRegistrationModel {
    let firstName: String
    let lastName: String
    let email: String
    let password: String
    let repeatPassword: String
}
This new struct should make my test method compile and pass.

Step 3. Refactor and Improve
At this step, I need to refactor and improve my code. There is nothing very important that I see to improve in this method at this moment. I will continue to the next step which will make a possible improvement a little bit more obvious. I will do the improvements then.
Step 4. Repeat
The next step is to pick up the next functionality that makes sense to work on and repeat the 3 steps again. I will need to write a failing unit test, then write an app code to make my test pass and then refactor and improve my code.
Validating User’s First Name
The next possible functional improvement that I can make is to validate if the provided value for the user’s first name is valid. To do that I will write a new test method.
Write test method that fails
func testUserFirstName_shouldPassIfValidFirstName() {
    let sut = UserRegistrationModel(firstName: "Sergey",
    lastName: "Kargopolov",
    email: "[email protected]",
    password: "123",
    repeatPassword: "123")

    XCTAssertTrue(sut.isValidFirstName())
 }
Write app code to make the test pass
I have created a test method and if I attempt to run it as is, it will fail because the isValidFirstName() function does not exist. There are so many different ways I can implement the validation code and for the purpose of simplicity, I will choose most likely the simplest one. I will enhance the UserRegistrationModel struct by creating an extension and will add there a new method called isValidFirstName().
struct UserRegistrationModel: UserRegistrationModelValidatorProtocol {
    let firstName: String
    let lastName: String
    let email: String
    let password: String
    let repeatPassword: String
}

extension UserRegistrationModel {
    func isValidFirstName() -> Bool {
        return firstName.count > 1
    }
}
Once again, I realize that there can be a better way to implement a Validator class and make the approach of validating model properties with different validation rules more maintainable and extensible. I will proceed with this simple example but in your project, you can enhance even further and create a separate validator class.
Now if I run this code it will pass because the value provided for the first name is greater than 1 character.
Refactor and improve
Now when I have two different test methods in my test class and clearly see how I can improve my code. For example, I can declare properties to the top of the class.
import XCTest
@testable import PhotoApp

class UserRegistrationModelTestCase: XCTestCase {

    var sut: UserRegistrationModel!
    let firstName = "Sergey"
    let lastName = "Kargopolov"
    let email = "[email protected]"
    let password = "12345678"
    let repeatPassword = "12345678"

    override func setUp() {
    }

    override func tearDown() {
        // Put teardown code here. This method is called after the invocation of each test method in the class.
        sut = nil
    }

    func testUserModelStruc_canCreateNewInstance() {
        sut = UserRegistrationModel(firstName: firstName,
        lastName: lastName,
        email: email,
        password: password,
        repeatPassword: repeatPassword)

        XCTAssertNotNil(sut)
     }

    func testUserFirstName_shouldPassIfValidFirstName() {
        sut = UserRegistrationModel(firstName: firstName,
        lastName: lastName,
        email: email,
        password: password,
        repeatPassword: repeatPassword)

        XCTAssertTrue(sut.isValidFirstName())
     }
}
I can see other code that is repeated and can be improved but I wonder how would you improve it? Let me know in the comments below how would you do it? 🙂.
Testing for invalid first name
Additionally to testing for a successful scenario, I like to test a use case when the user has provided an invalid value. The below unit test will pass only of the provided value of the user’s first name will be invalid.
func testUserFirstName_shouldPassIfFirstNameIsNotValid() {
    sut = UserRegistrationModel(firstName: "S",
    lastName: lastName,
    email: email,
    password: password,
    repeatPassword: repeatPassword)

    XCTAssertFalse(sut.isValidFirstName())
}
Complete Code Example
Below is a Swift code example that covers unit testing of other properties in a User Registration Model struct.
The Model class
import Foundation

struct UserRegistrationModel {
    let firstName: String
    let lastName: String
    let email: String
    let password: String
    let repeatPassword: String
}

extension UserRegistrationModel {
    func isValidFirstName() -> Bool {
        return firstName.count > 1
    }

    func isValidLastName() -> Bool {
        return lastName.count > 1
    }

    func isValidEmail() -> Bool {
        return email.contains("@") && email.contains(".")
    }

    func isValidPasswordLength() -> Bool {
        return password.count >= 8 && password.count <= 16
    }

    func doPasswordsMatch() -> Bool {
        return password == repeatPassword
    }

    func isValidPassword() -> Bool {
        return isValidPasswordLength() && doPasswordsMatch()
    }

    func isDataValid() -> Bool {
        return isValidFirstName() && isValidLastName() && isValidEmail() && isValidPasswordLength() &&
        doPasswordsMatch()
    }
}
The Test Case class
import XCTest
@testable import PhotoApp

class UserRegistrationModelTestCase: XCTestCase {

    var sut: UserRegistrationModelValidatorProtocol!
    let firstName = "Sergey"
    let lastName = "Kargopolov"
    let email = "[email protected]"
    let password = "12345678"
    let repeatPassword = "12345678"

    override func setUp() {
    }

    override func tearDown() {
        // Put teardown code here. This method is called after the invocation of each test method in the class.
        sut = nil
    }

    func testUserModelStruc_canCreateNewInstance() {
        sut = UserRegistrationModel(firstName: firstName,
        lastName: lastName,
        email: email,
        password: password,
        repeatPassword: repeatPassword)

        XCTAssertNotNil(sut)
     }

    func testUserFirstName_shouldPassIfValidFirstName() {
        sut = UserRegistrationModel(firstName: firstName,
        lastName: lastName,
        email: email,
        password: password,
        repeatPassword: repeatPassword)

        XCTAssertTrue(sut.isValidFirstName())
     }

    func testUserFirstName_shouldPassIfFirstNameLessThanMinLength() {
        sut = UserRegistrationModel(firstName: "S",
        lastName: lastName,
        email: email,
        password: password,
        repeatPassword: repeatPassword)

        XCTAssertFalse(sut.isValidFirstName())
    }

    func testUserLastName_shouldPassIfValidLastName() {
        sut = UserRegistrationModel(firstName: firstName,
        lastName: lastName,
        email: email,
        password: password,
        repeatPassword: repeatPassword)

        XCTAssertTrue(sut.isValidLastName())
    }

    func testUserLastName_shouldPassIfLastNameLessThanMinLength() {
        sut = UserRegistrationModel(firstName: firstName,
        lastName: "K",
        email: email,
        password: password,
        repeatPassword: repeatPassword)

        XCTAssertFalse(sut.isValidLastName())
    }

    func testUserRegistrationModel_shouldPassIfValidEmail() {
        sut = UserRegistrationModel(firstName: firstName,
        lastName: lastName,
        email: email,
        password: password,
        repeatPassword: repeatPassword)

        XCTAssertTrue(sut.isValidEmail())
    }

    func testUserRegistrationModel_shouldPassIfInValidEmail() {

        sut = UserRegistrationModel(firstName: firstName,
        lastName: lastName,
        email: "test.com",
        password: password,
        repeatPassword: repeatPassword)

        XCTAssertFalse(sut.isValidEmail())
    }

    func testUserRegistrationModel_shouldPassIfValidPasswordLength() {
        sut = UserRegistrationModel(firstName: firstName,
        lastName: lastName,
        email: email,
        password: password,
        repeatPassword: repeatPassword)

        XCTAssertTrue(sut.isValidPasswordLength())
    }

    func testUserPassword_passwordAndRepeatPasswordMustMatch() {
        sut = UserRegistrationModel(firstName: firstName,
        lastName: lastName,
        email: email,
        password: password,
        repeatPassword: repeatPassword)

        XCTAssertTrue(sut.doPasswordsMatch())
    }

    func testUserPassword_shouldPassIfPasswordIsValid() {
        sut = UserRegistrationModel(firstName: firstName,
        lastName: lastName,
        email: email,
        password: password,
        repeatPassword: repeatPassword)

        XCTAssertTrue(sut.isValidPassword())
    }

}
I hope this tutorial was of some value to you. I will be sharing more code examples on Unit Testing with Swift, so stay tuned!
Happy learning! 🙋🏻♂️