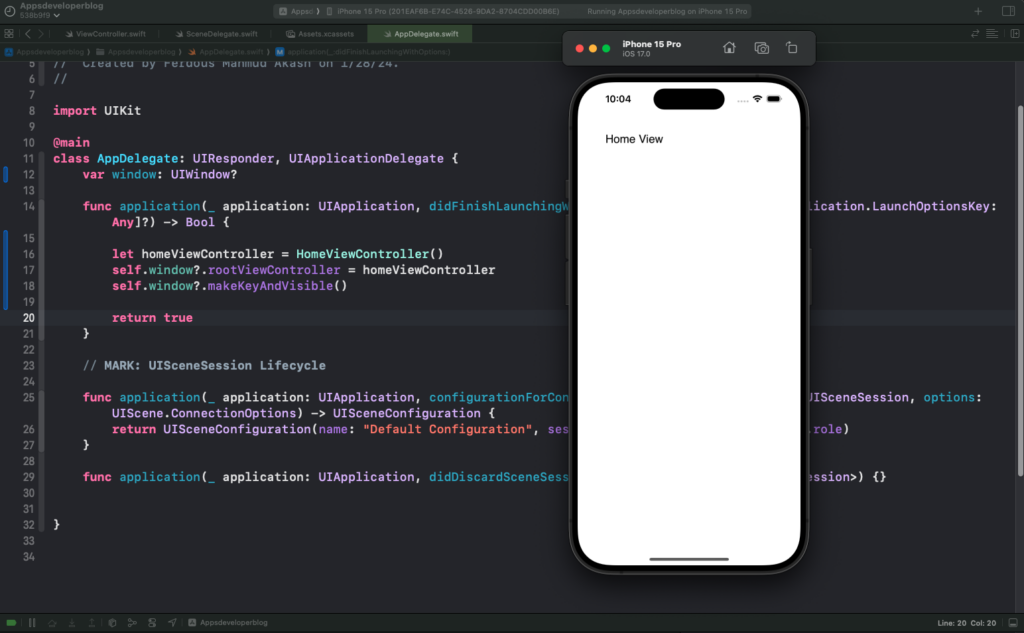
In this tutorial, you will learn how to navigate from AppDelegate.swift to different ViewController in Swift.
By the end of this tutorial, you will have a working Swift code example that you can use in your mobile application.
To learn how to present view controller from another view controller, please read the following tutorial: Present ViewController in Swift.
Step 1: Create the View Controller
Before navigating to a different view controller, you need to create the view controller you want to navigate to. This involves creating a new Swift file for your view controller and ensuring it inherits from UIViewController. Here’s an example of how to create a simple view controller named HomeViewController.
import UIKit

class HomeViewController: UIViewController {
    override func viewDidLoad() {
        super.viewDidLoad()
        // Setup your view controller here
    }
}
Step 2: Initialize the View Controller in AppDelegate.swift
Next, you need to initialize the view controller you created. This is done by creating an instance of your view controller class. In the context of your AppDelegate.swift, you can do this within the application(_:didFinishLaunchingWithOptions:) method.
let homeViewController = HomeViewController()
Step 3: Set the Root View Controller
After initializing your view controller, you need to set it as the root view controller of your window. This means that when your app launches, this view controller will be the first screen that the user sees.
self.window?.rootViewController = homeViewController
Step 4: Make the Window Key and Visible
Finally, to make your window key and visible, you need to call makeKeyAndVisible() on your window. This will display your window on the screen and bring it to the front.
self.window?.makeKeyAndVisible()
Complete Code Example
Putting it all together, your AppDelegate.swift should look like this:
import UIKit

@main
class AppDelegate: UIResponder, UIApplicationDelegate {
    var window: UIWindow?

    func application(_ application: UIApplication, didFinishLaunchingWithOptions launchOptions: [UIApplication.LaunchOptionsKey: Any]?) -> Bool {
        let homeViewController = HomeViewController()
        self.window?.rootViewController = homeViewController
        self.window?.makeKeyAndVisible()

        return true
    }

    // MARK: UISceneSession Lifecycle

    func application(_ application: UIApplication, configurationForConnecting connectingSceneSession: UISceneSession, options: UIScene.ConnectionOptions) -> UISceneConfiguration {
        return UISceneConfiguration(name: "Default Configuration", sessionRole: connectingSceneSession.role)
    }

    func application(_ application: UIApplication, didDiscardSceneSessions sceneSessions: Set<UISceneSession>) {}
}

Conclusion
I hope this tutorial was helpful to you.
To learn more about Swift and to find other code examples, check the following page: Swift Code Examples.
Keep coding!