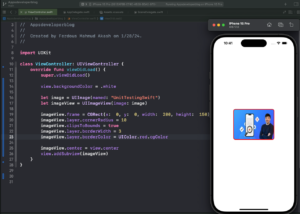
In this tutorial, you will learn how to make the corners of a UIImage rounded in Swift. I’ll start by creating a UIImageView, then apply a corner radius to its layer to achieve the rounded effect. Additionally, I’ll show you how to add a border around the image.
If you are interested in video lessons on how to write Unit tests and UI tests to test your Swift mobile app, check out this page: Unit Testing Swift Mobile App
This tutorial assumes you have a basic understanding of Swift and iOS development.
Step 1: Setting up the View Controller
Let’s begin by creating a very simple UIViewController.
import UIKit

class ViewController: UIViewController {
    override func viewDidLoad() {
        super.viewDidLoad()

        view.backgroundColor = .white

        // Rest of the code will go here
    }
}
Step 2: Create a UIImageView with Your Image
Next, I will create a UIImageView and set an image to it. In the code example below I will use an image named “UnitTestingSwift” from the app’s assets. You can select any other image that you have in your app assets.
let image = UIImage(named: "UnitTestingSwift") // Replace image name to your image name
let imageView = UIImageView(image: image)
Step 3: Define the Frame and Set the Corner Radius
After creating the UIImageView, I will define its frame and set the corner radius to make the image corners rounded. I will also enable clipsToBounds to ensure the image conforms to the new shape:
imageView.frame = CGRect(x:  0, y:  0, width:  200, height:  150)
imageView.layer.cornerRadius =  10
imageView.clipsToBounds = true
The cornerRadius property defines the radius of the curve at each corner. A value of 10 will make the corners slightly rounded. You can play with the value and adjust it to what value you need.
Step 4: Add a Border Around the UIImageView
Now, let’s add a border around our image view. I will set the borderWidth and borderColor properties of the image view’s layer:
imageView.layer.borderWidth =  3
imageView.layer.borderColor = UIColor.red.cgColor
Step 5: Center the UIImageView and Add It to the View Hierarchy
Finally, I will center the UIImageView within the view controller’s view and add it to the view hierarchy:
imageView.center = view.center
view.addSubview(imageView)
Complete Code Example
Below is a complete code example that uses all the code code snippets I created above.
import UIKit

class ViewController: UIViewController {
    override func viewDidLoad() {
        super.viewDidLoad()

        view.backgroundColor = .white

        let image = UIImage(named: "UnitTestingSwift")
        let imageView = UIImageView(image: image)

        imageView.frame = CGRect(x:  0, y:  0, width:  200, height:  150)
        imageView.layer.cornerRadius =  10
        imageView.clipsToBounds = true
        imageView.layer.borderWidth =  3
        imageView.layer.borderColor = UIColor.red.cgColor

        imageView.center = view.center
        view.addSubview(imageView)
    }
}
Conclusion
I hope this tutorial was helpful to you. You now know how to make the corners of a UIImage rounded in Swift. If you want to learn more about how to make circular images programmatically in Swift you can check this tutorial.
To learn more about Swift and to find other code examples, check the following page: Swift Code Examples.
