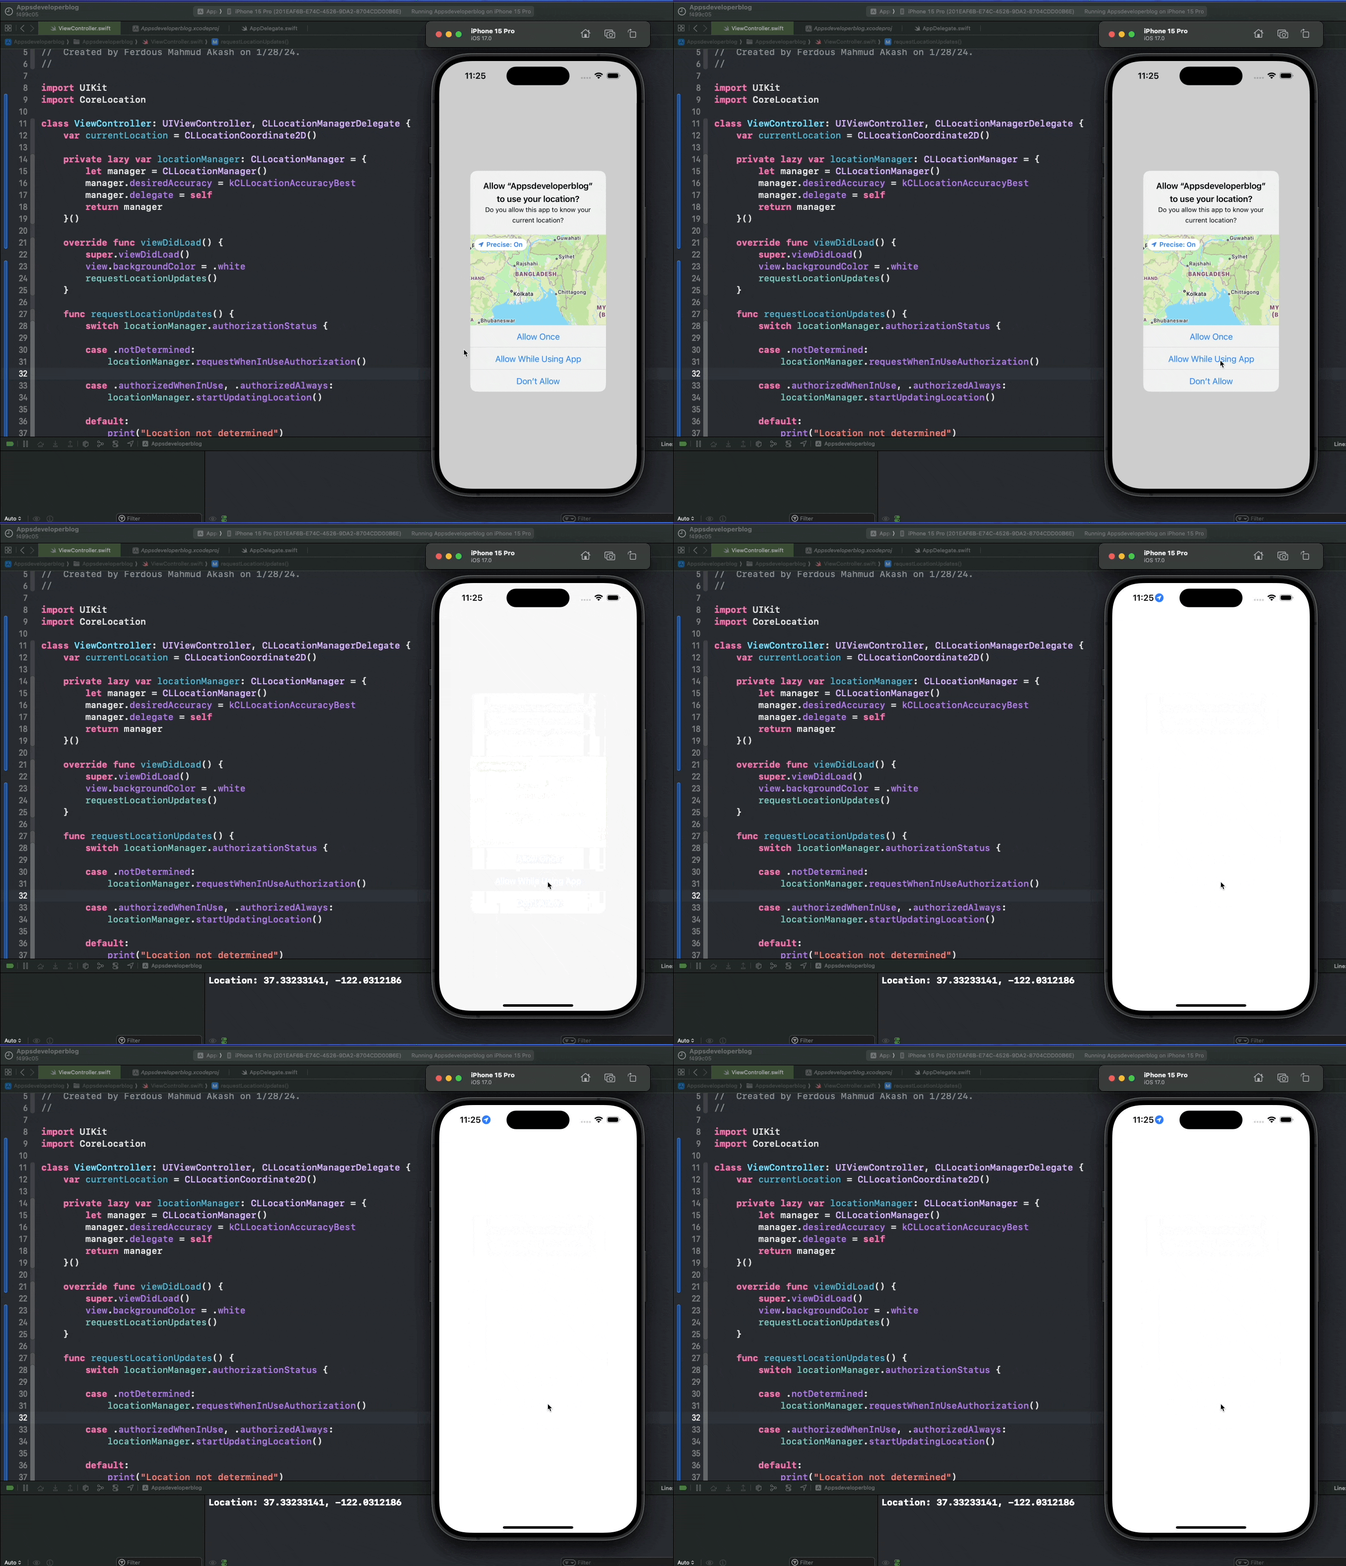
In this tutorial, you will learn how to determine a user’s current location in Swift using CLLocationManager and CLLocationManagerDelegate.
CLLocationManager is the class that you use to start and stop the delivery of location-related events to your app. You can use it to track the user’s current location, report heading changes, monitor regions of interest, and range nearby beacons.
CLLocationManagerDelegate is the protocol that defines the methods that you use to receive events from an associated location-manager object. You can use it to handle authorization changes, location updates, heading updates, region events, and beacon events
Let’s learn how to use them to determine user’s current location.
Step 1: Request User’s Permission for Location Access
To access the user’s location, you must first request permission from the user. This is done using the CLLocationManager class, which manages the delivery of location and heading events.
Here’s how you can request the user’s permission:
import UIKit
import CoreLocation

class ViewController: UIViewController, CLLocationManagerDelegate {
    private lazy var locationManager: CLLocationManager = {
        let manager = CLLocationManager()
        manager.delegate = self
        return manager
    }()

    override func viewDidLoad() {
        super.viewDidLoad()
        requestLocationUpdates()
    }

    func requestLocationUpdates() {
        switch locationManager.authorizationStatus {
        case .notDetermined:
            locationManager.requestWhenInUseAuthorization() // or requestAlwaysAuthorization()
        case .authorizedWhenInUse, .authorizedAlways:
            locationManager.startUpdatingLocation()
        default:
            print("Location not determined")
        }
    }
}
In the above code, you check the authorization status and request permission for location updates using requestLocationUpdates(). If permission is granted, it starts updating the user’s location. This means that the locationManager object will begin to generate events that report the user’s current location to your app.
These events are delivered to your delegate object, which is the ViewController class in this case. Your delegate object can implement the locationManager(_ manager: CLLocationManager, didUpdateLocations locations: [CLLocation]) method to handle the location updates.
Step 2: Update Info.plist with Usage Description
You need to add the NSLocationWhenInUseUsageDescription and NSLocationAlwaysUsageDescription keys to your Info.plist file. These keys provide the text that will be displayed to the user when the app requests location permissions.
Open your Info.plist and add the following entries:
<key>NSLocationWhenInUseUsageDescription</key>
<string>This app needs access to location when open.</string>
<key>NSLocationAlwaysUsageDescription</key>
<string>This app needs access to location always.</string>
Step 3: Implement locationManager DidUpdateLocations Function
The locationManager(_:didUpdateLocations:) function is a delegate method that is called when the location manager updates the user’s location. You can implement this function to handle the location updates.
func locationManager(_ manager: CLLocationManager, didUpdateLocations locations: [CLLocation]) {
    guard let location = locations.last else { return }
    print("Location: \(location.coordinate.latitude), \(location.coordinate.longitude)")
    locationManager.stopUpdatingLocation()
}
Step 4: Get User’s Current Location Latitude and Longitude
With the location updates in place, you can now access the user’s current location latitude and longitude. The CLLocation object contains the latitude and longitude information.
let latitude = location.coordinate.latitude
let longitude = location.coordinate.longitude
Complete Code Example
Below is a complete code example that includes all the above-mentioned code snippets.
import UIKit
import CoreLocation

class ViewController: UIViewController, CLLocationManagerDelegate {
    var currentLocation = CLLocationCoordinate2D()

    private lazy var locationManager: CLLocationManager = {
        let manager = CLLocationManager()
        manager.desiredAccuracy = kCLLocationAccuracyBest
        manager.delegate = self
        return manager
    }()

    override func viewDidLoad() {
        super.viewDidLoad()
        view.backgroundColor = .white
        requestLocationUpdates()
    }

    func requestLocationUpdates() {
        switch locationManager.authorizationStatus {

        case .notDetermined:
            locationManager.requestWhenInUseAuthorization()

        case .authorizedWhenInUse, .authorizedAlways:
            locationManager.startUpdatingLocation()

        default:
            print("Location not determined")
        }
    }

    func locationManagerDidChangeAuthorization(_ manager: CLLocationManager) {
        switch manager.authorizationStatus {
        case .authorizedWhenInUse, .authorizedAlways:
            manager.startUpdatingLocation()
        default:
            manager.stopUpdatingLocation()
        }
    }

    func locationManager(_ manager: CLLocationManager, didUpdateLocations locations: [CLLocation]) {
        guard let location = locations.last else { return }
        currentLocation = location.coordinate
        print("Location: \(location.coordinate.latitude), \(location.coordinate.longitude)")
        locationManager.stopUpdatingLocation()
    }

    func locationManager(_ manager: CLLocationManager, didFailWithError error: Error) {
        print("error")
    }
}
Conclusion
If you are interested in video lessons on how to write Unit tests and UI tests to test your Swift mobile app, check out this page: Unit Testing Swift Mobile App
I hope this tutorial was helpful to you. You now know how to determine the user’s current location in Swift.
To learn more about Swift and to find other code examples, check the following page: Swift Code Examples.
Happy learning!
