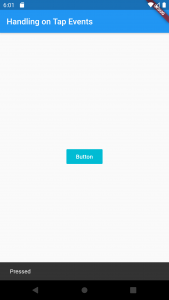
In this Flutter tutorial, you will learn how to handle button tap events. The two most commonly used button events are onTap and onPressed. In the code snippets below, I will use the onPressed event most of the time. You can use the onTap event just the same way as onPressed.
If you are interested in Flutter video tutorials, check this playlist: Flutter Video Tutorials. Also, there is a large collection of code examples if you check Flutter tutorials page.
All button type widgets have onPressed and onTap property, which is basically a callback function that is called once the button is pressed or otherwise activated. What the callback function will do is entirely up to you as a developer but you must provide an implementation for it because otherwise, the button will do nothing when is pressed.
The onPressed Button Event Example
In the example below, we have a FlatButton. When the button is pressed it will show a snackbar with a message “pressed”.
FlatButton(
   color: Colors.cyan,
   textColor: Colors.white,
   onPressed: () {
     final snackBar = SnackBar(content: Text("Pressed"));

     Scaffold.of(context).showSnackBar(snackBar);
   },
   child: Text('My Button'),
 )
If you run the above code snippet in your app, the button will look like the one in the image below:

To set the onPressed property, you can pass to it an anonymous function, like in the example below.
    return FlatButton(
      color: Colors.cyan,
      textColor: Colors.white,
      onPressed: () {
          // this is called an empty function
       },

      child: Text('Button'),
    );
If the onPressed event is set to null, the button will be disabled by default, so passing an empty function will help you visualize your button until you decide what the callback function will be.
I hope this very short Flutter tutorial helpful to you. If you are interested in learning Flutter, please check other Flutter tutorials on this site. Some of them have video tutorials included.
Happy learning!