In this tutorial, you will learn how to create a simple Web Service Project with Spring Boot Intializr and then build and run it. After creating the web service project, we will add additional functionality. So, let’s get started.
Multiple Ways to Create a Spring Boot Web Service Project
There are three different ways to create a Spring Boot Web service project.
- First, with Spring Boot Initializr,
- Second, with Spring Tool Suite or STS,
- Thirdly with the Java editor of any choice, adding the needed dependencies into the pom.xml file, then building and running it with Maven.
In my experience, the simplest way is to use the Spring Boot Initializr.
Create Web Service using Spring Initializr
First, go to the following URL
You will see a page like this. Over time it may change a bit. But the required fields will almost always stay the same.
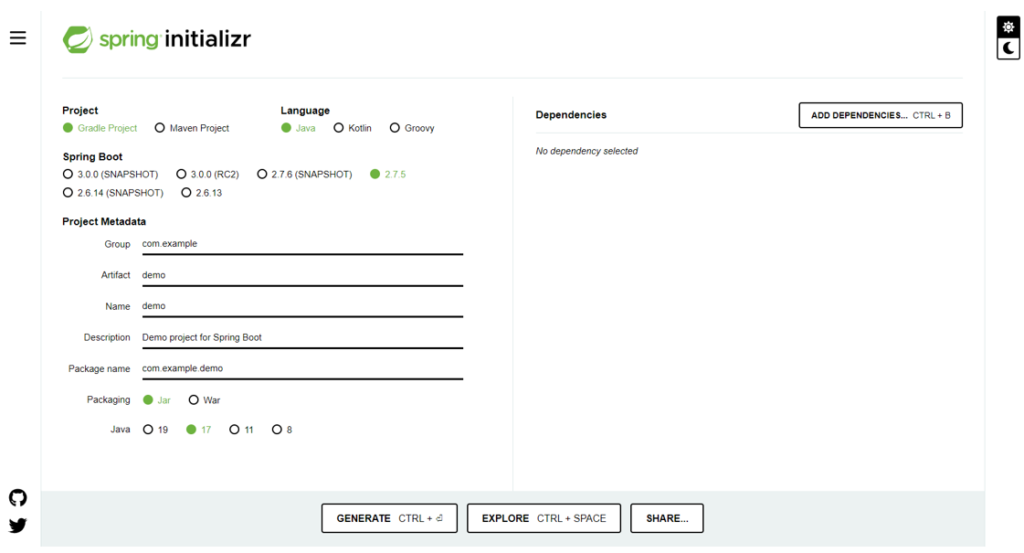
Fill in this form with the following details:
- Project – You can choose either the Gradle project or the Maven project, according to the requirement. But as we are building the project with maven, I will select maven.
- Language – Choose the language of your choice. I will go with Java.
- Spring Boot – it’s better to go with the default one. Like in my case, it is 2.7.5.
- Group – Here provide the root package name of your project. For example, I am going to build a RESTful Web Service API for my mobile app so the package name for my project will be: com.appsdeveloperblog.ws.api. Where the com.appsdeveloperblog is the reverse domain name of my website. You can provide any name instead of “appsdeveloperblog” for example com.hellojava.ws.api.
- Artifact – Provide any project name here. In my case, it will be mobile-app-ws. You can go by any name.
- Name – you can go with any name or the name that appears by default.
- Description – You can give a simple description here. For example, “Demo project for Spring Boot”.
- Package Name – It can be the same as the group, or you can go with the one that appears by default.
- Packaging –When you build a project, it can be packaged into a Jar or War archive. If you are going to deploy this application as a web application to Apache Tomcat, then as a package, you will select War. Otherwise, in most cases, you will package your application as a Jar file.
- Java – It’s better to go with the default selected version. But you can select any according to your needs.
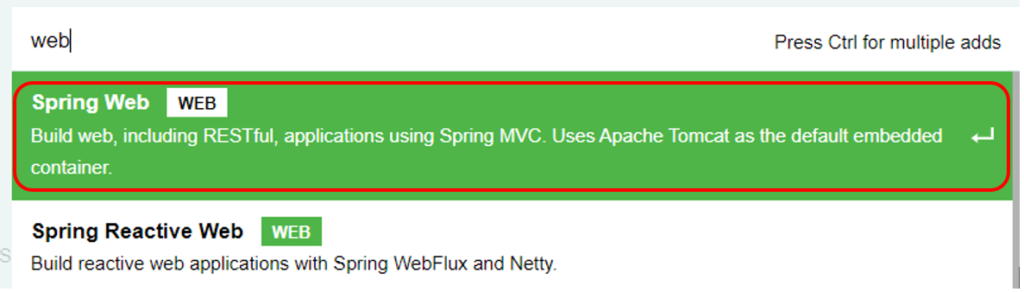
- For the Dependencies, click add dependencies and Search Web. Select the following. These Web Spring dependencies will add the support for needed libraries to make your web service build and run with Tomcat Servlet Container.
After filling out the form, it will look like this:
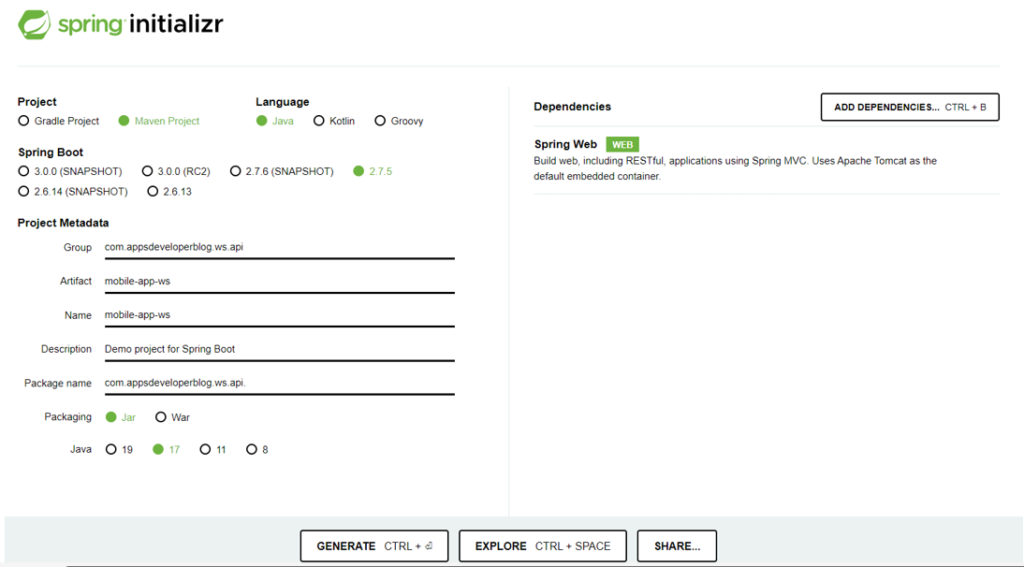
Click on Generate button.

This will generate the Web Service project for you. A zip file will be downloaded to your computer. Unzip the project and move it to your preferred directory.
Creating RestController
We have just created a project using Spring Boot Initializr. To make it work as a Web Service and handle HTTP requests, we need to create a new class and annotate it with a few special annotations. Have a look at the very simple class below:
import org.springframework.web.bind.annotation.GetMapping;
import org.springframework.web.bind.annotation.RequestMapping;
import org.springframework.web.bind.annotation.RestController;

/**
 *
 * @author skargopolov
 */
@RestController
@RequestMapping("users")
public class UserController {

    @GetMapping("/status/check")
    public String status() {
        return "working";
    }
}
This class is annotated with @RestController and @RequestMapping annotations.
The @RestController annotation will register this class with a framework to ensure it is available to handle HTTP Requests. While the @RequestMapping annotation will make the methods in this Resource class available when a request is sent to /users URL request path. For example:
http://localhost:8080/users
Note that a method in the above Controller class is also annotated with @GetMapping annotation.
The @GetMapping annotation will register this method with a framework and will trigger this method when HTTP Get request is sent to a /users/status/check URL path. For example:
http://localhost:8080/users/status/check
The method will return back a straightforward response “working”.
Build and Run Web Service
You can use the following Maven command to build your project.
maven package
to run this web service using the built-in Tomcat Servlet Container, use the following command:
mvn spring-boot:run
where the mobile-app-ws-0.0.1-SNAPSHOT.jar is the name of the JAR file, which was generated by the maven install command and was placed inside the target folder. Choose your own file name by going to the target folder.
Sending HTTP GET Request
The above-created RestController class contains a method with a @GetMapping annotation which means that this method will be executed when our RestController receives HTTP GET request.
There are many ways to send HTTP Get requests, and the simplest is probably by simply opening the target URL in a browser window. For example, if you open the below URL in the browser window, you will trigger the method we have defined:
http://localhost:8080/users/status/check
Using CURL
Or you can use this simple CURL command to send HTTP Get Request from your command line in the terminal window:
curl -i -X GET "http://localhost:8080/users/status/check"
Video Tutorial
A video tutorial is also available for this section.
So that’s the end of this tutorial. In this tutorial, we have built a simple web service using Spring Initializr. We added some annotations for it to handle HTTP requests and respond back to the request. If you find this tutorial helpful, check out my other tutorials. I also offer multiple courses on building RESTful Web Services with Spring Boot. Do check them out here.